English

Easily Replace and Install a Kitchen Faucet Step-by-Step
September 19, 2024
Post Views: 1529


Jabra Sanitary is a sanitaryware supplier offering toilets, sinks, faucets, bathtubs, etc., at competitive prices. If you're a distributor, wholesaler, or project contractor, get a quote today!
 $23.9 Limited-time Offer
- Consignment Policy
- 20 Years of Experience
Replacing a kitchen faucet is a practical way to refresh the look of your kitchen and improve its functionality. Whether your old faucet is leaking, outdated, or simply not performing well, installing a new one can make a significant difference. Knowing how long do kitchen faucets last and how to change kitchen faucet is essential to maintaining your kitchen's functionality.
This guide will walk you through the steps of changing your kitchen faucet, from gathering the right tools to ensuring a secure, leak-free installation.

Table of Contents
When to Replace Your Kitchen Faucet
Get the Tools for Changing Kitchen Faucet
Prepare Materials for the Kitchen Sink Faucet Replacement
Cost to Replace Kitchen Faucet
How to Replace Your Kitchen Faucet - A Step-by-Step Guide
How to Install the New Faucet - An Instructional Tutorial
Additional Steps: How to Change Kitchen Faucet
Tips for Changing a Kitchen Faucet
How to Replace Kitchen Faucet Cartridge
How Do I Replace Hose for Kitchen Faucet Sprayer
Upgrade Your Kitchen with a New Jabra Sanitary Faucet
FAQs
Final Thoughts
When to Replace Your Kitchen Faucet
Knowing when to replace your kitchen faucet is crucial for maintaining an efficient and functional kitchen. Kitchen faucets generally last around 15-20 years, depending on the quality and usage.
Signs that it might be time for a replacement include persistent leaks, corrosion, and a decrease in water pressure. If your faucet has become difficult to operate or is visibly outdated, it may be time to consider an upgrade.
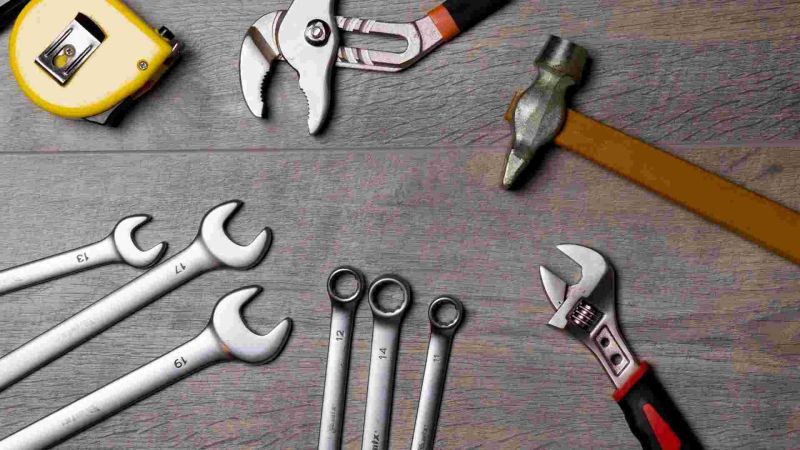
Get the Tools for Changing Kitchen Faucet
Before starting the replacement process, ensure you have the necessary tools on hand. The basic tools you will need include an adjustable wrench, basin wrench, plumber's putty, Teflon tape, and a bucket. Having the right tools ensures your kitchen sink faucet replacement goes smoothly.
Having the right tools ready will make the process smoother and more efficient, saving you time and effort during installation.
Prepare Materials for the Kitchen Sink Faucet Replacement
In addition to tools, gather the materials required for the replacement. You'll need the new faucet, supply lines (if not included with the faucet), plumber's tape, and a cleaning cloth. These are essential for changing kitchen faucet efficiently.
Ensure that you have the correct size faucet and supply lines that are compatible with your sink. <Check sink size guide> It's also wise to have a towel or sponge nearby to clean up any spills and a small container to catch any excess water during the removal process.
Cost to Replace Kitchen Faucet
The cost to replace a kitchen faucet varies depending on the type of faucet you choose and whether you decide to hire a professional. On average, a new kitchen faucet can cost between $50 to $300. If you're wondering how hard is it to replace a kitchen faucet, it depends on whether you want to DIY or hire a professional.
If you opt for a high-end model with advanced features, the price can go up to $500 or more. If hiring a plumber for installation, labor costs can range from $150 to $350, depending on the complexity of the installation and your location.
How to Replace Your Kitchen Faucet - A Step-by-Step Guide
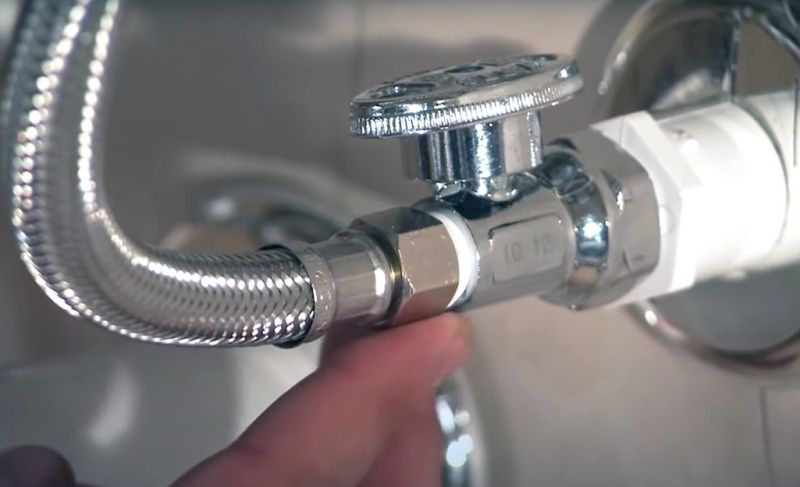
Cut Off the Water Supply and Disconnect the Hose
Start by shutting off the water supply to the faucet. Look for the valves under the sink and turn them clockwise to close.
If you can't find the valves, you may need to turn off the main water supply to your home. Once the water supply is off, place a bucket under the sink to catch any water that may spill during the process. Use an adjustable wrench to disconnect the water supply lines from the faucet.

Turn On the Old Faucet and Release the Pressure
Turn on the faucet to release any remaining water and relieve pressure in the lines. This step helps to minimize spills and makes it easier to remove the faucet.
Allow the water to drain completely before proceeding to the next step in how to replace kitchen faucet.
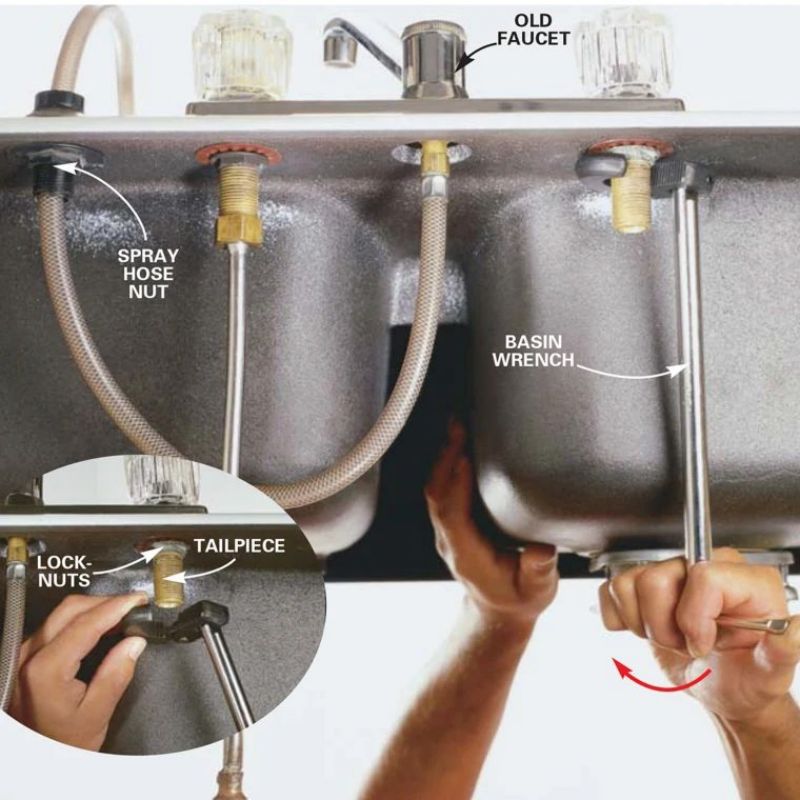
Remove the Old Faucet
Use a basin wrench to loosen and remove the nuts securing the faucet to the sink. Carefully lift the old faucet out of the sink.
If the faucet is stuck due to rust or mineral buildup, gently tap around the base with a wrench to loosen it. Clean any old putty or debris from the sink surface to prepare for the new faucet installation.
How to Install the New Faucet - An Instructional Tutorial
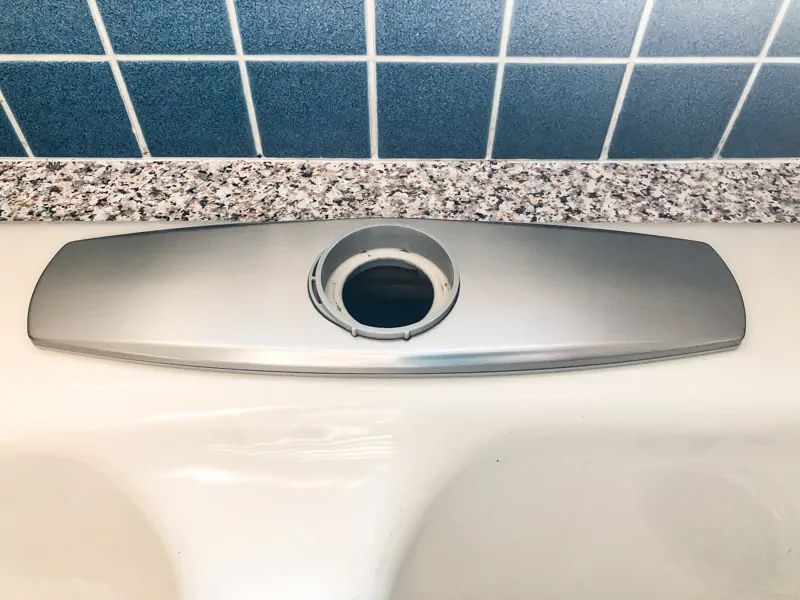
Install the Deck Plate (Optional)
If your new faucet includes a deck plate, install it before placing the faucet. The deck plate covers any extra holes in the sink, providing a cleaner look.
Apply a bead of plumber's putty around the edge of the deck plate to ensure a watertight seal. Position the deck plate over the holes on the sink, pressing it firmly into place.
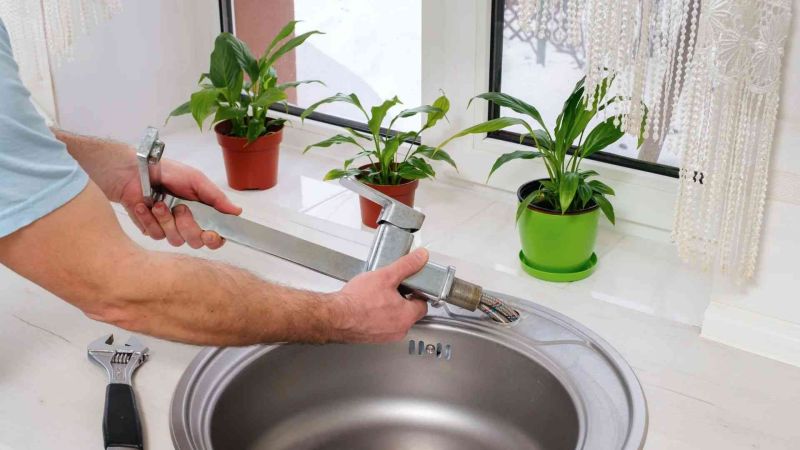
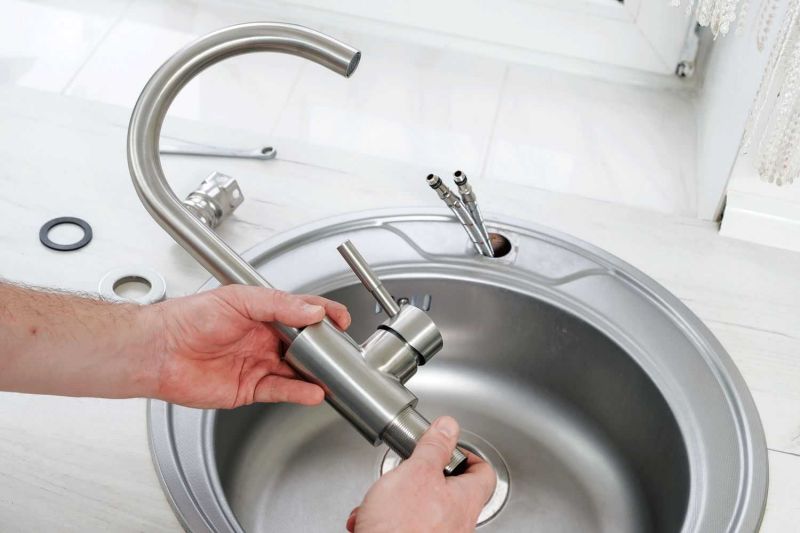
Kitchen Faucets Head Replacement
Insert the faucet through the mounting holes on the sink. Make sure it is properly aligned and sitting flush against the sink surface. From underneath the sink, use the provided mounting hardware to secure the faucet.
Hand-tighten the mounting nuts to hold the faucet in place, and make any necessary adjustments to ensure it is correctly aligned before fully tightening.
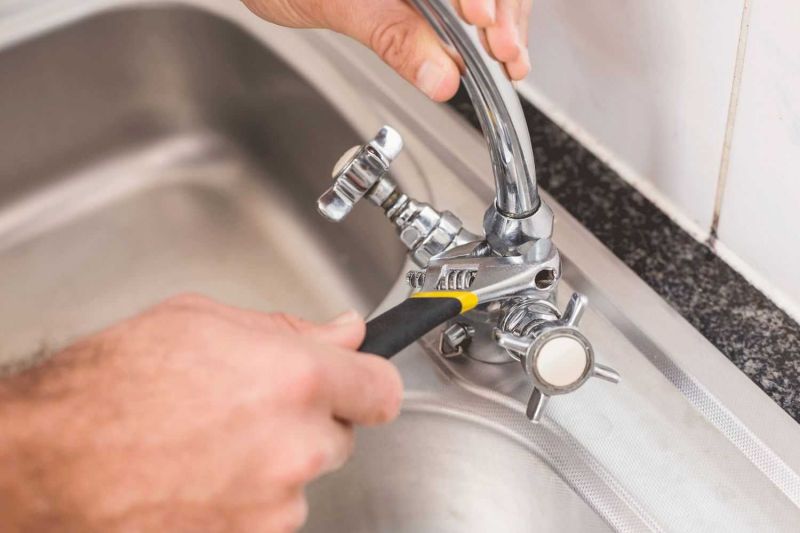
Tighten the Nut with the Adjustable Wrench
Once the faucet is properly positioned, use an adjustable wrench to tighten the mounting nuts. Make sure the faucet is securely fastened to the sink but be careful not to overtighten, as this can damage the sink or faucet components.
Double-check that the faucet is stable and does not move when you apply pressure.
Connect the Water Supply Line to the Faucet
Connect the water supply lines to the faucet's inlet valves. Use an adjustable wrench to tighten the connections, ensuring a secure fit.
Wrap plumber's tape around the threads of the connections to prevent leaks. If your new faucet comes with built-in supply lines, connect them directly to the shut-off valves under the sink.
Use Plumber's Putty to Secure Connections
Apply plumber's putty around the base of the faucet and at any connection points to ensure a watertight seal. This step is essential to prevent leaks and provide long-lasting durability.
After applying the putty, wipe away any excess material with a clean cloth. Allow the putty to dry for two to three hours before testing the faucet.
Additional Steps: How to Change Kitchen Faucet
Check for Water Leakage
After the plumber's putty has dried, slowly turn on the water supply and check for any leaks. Inspect the connections under the sink and around the faucet base.
If you notice any leaks, turn off the water supply and tighten the connections as needed. It's crucial to address any leaks immediately to prevent water damage and ensure the faucet operates correctly.
Check Hot and Cold Water and Water Pressure
After ensuring there are no leaks, turn on the faucet and test both the hot and cold water. Let the water run for a minute to clear any debris or air in the lines.
Check the water pressure and make sure it is consistent with what you expect. If the pressure is too low or high, adjust the shut-off valves under the sink as needed.
Ensure the faucet is functioning properly and the water temperature adjusts correctly when switching between hot and cold settings.
Tidy-Up the Area
Once you have verified that the faucet is working correctly, tidy up the area. Remove any tools, debris, and towels from under the sink.
Wipe down the sink and the faucet to remove any fingerprints, excess putty, or water spots. Make sure all connections are tight and secure one last time before wrapping up the installation.
Tips for Changing a Kitchen Faucet
Changing a kitchen faucet can be straightforward if you follow the proper steps. Here are some tips to help you with the process:
- Take a photo of the old faucet setup before removal for reference.
- Measure the distance between the holes on your sink to ensure the new faucet is compatible.
- If you encounter rusted or stuck parts, use a penetrating oil to help loosen them.
- Label the hot and cold water supply lines to avoid confusion during installation.
- If you're unsure about any step, consult the faucet's installation manual or seek professional help.
How to Replace Kitchen Faucet Cartridge
A faulty cartridge can cause leaks or issues with water temperature control. Replacing the cartridge is often a quick fix to restore your faucet's functionality.
Follow these steps to replace the kitchen faucet cartridge:
Removing the Handle
First, turn off the water supply to the faucet. Then, use a screwdriver or Allen wrench to remove the handle.
This usually involves unscrewing a small set screw located on the base or behind a decorative cap. Once the screw is removed, pull the handle off to expose the cartridge.
Extracting the Old Cartridge
Use pliers to grab the top of the cartridge and pull it straight out. Some cartridges are held in place by a retaining nut, so you may need to use an adjustable wrench to remove it first. Take note of the cartridge's orientation to ensure the new one is installed correctly.
Installing the New Cartridge
Insert the new cartridge into the faucet body, making sure it is aligned in the same way as the old one. If there is a retaining nut, tighten it with the adjustable wrench.
Reattach the handle and secure it with the set screw. Turn on the water supply and test the faucet for proper operation and any leaks.
How Do I Replace Hose for Kitchen Faucet Sprayer
If your faucet sprayer hose is leaking or worn out, replacing it can restore the functionality of your sprayer. Here's how to replace the hose for a kitchen faucet sprayer:
Disconnecting the Old Hose
First, turn off the water supply and place a bucket under the sink to catch any water that may spill. Disconnect the sprayer hose from the faucet by unscrewing the connector.
Depending on the model, you might need to use an adjustable wrench or simply twist the connector by hand.
Removing the Hose
Once the hose is disconnected, pull it out from the top of the faucet. If the hose is held in place by a weight or clip, remove these components first.
Dispose of the old hose properly and clean the faucet area to prepare for the new hose installation.
Installing the New Hose
Feed the new hose through the faucet hole from the top. If your faucet has a weight, attach it to the new hose at the appropriate position.
Connect the new hose to the faucet by screwing the connector into place. Tighten it securely with an adjustable wrench if necessary. Turn on the water supply and test the sprayer for leaks and proper operation.
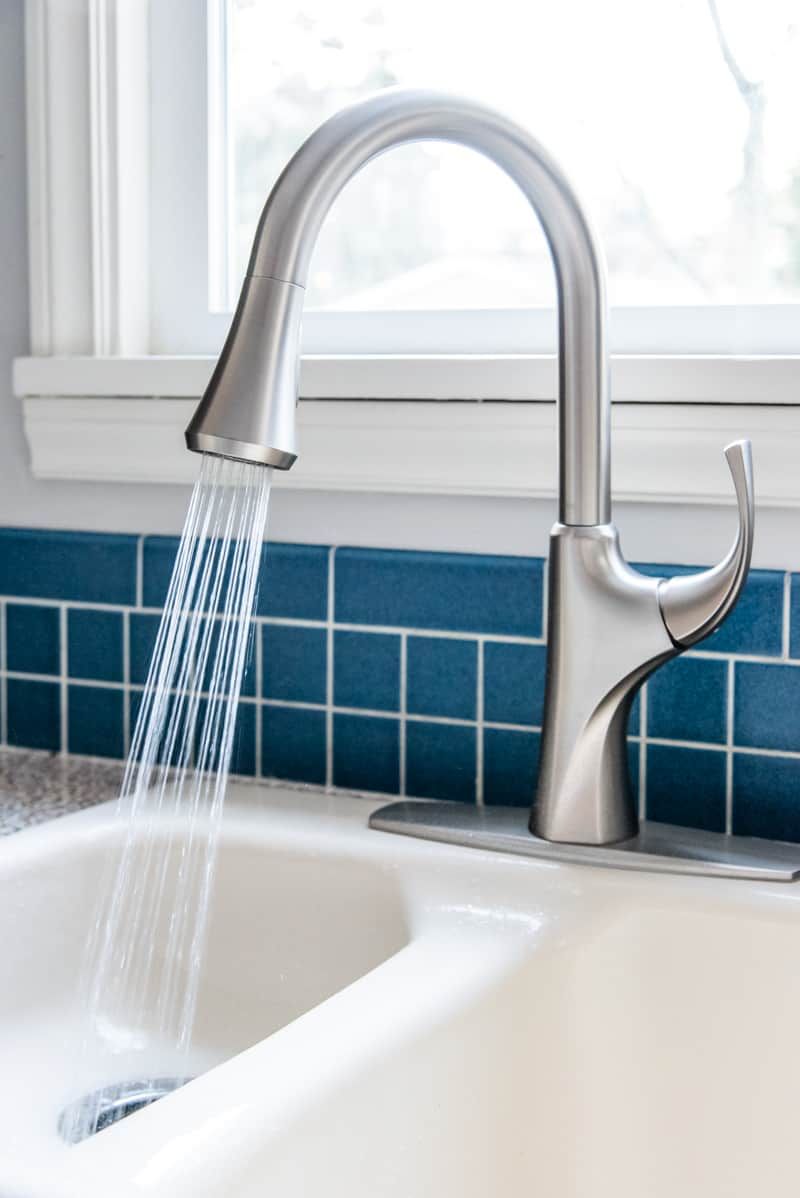
Upgrade Your Kitchen with a New Jabra Sanitary Faucet
Upgrading to a modern kitchen faucet, like the faucet from Jabra Sanitary, can enhance both the style and functionality of your kitchen. These faucets offer advanced features such as touchless operation, pull-down sprayers, and water-saving technologies.
Installing a high-quality faucet not only improves the aesthetic appeal of your kitchen but also ensures durability and ease of use for years to come.
FAQs
Are all kitchen faucets compatible with the kitchen sink?
Not all kitchen faucets are compatible with every sink. It's essential to match the faucet with the sink's hole configuration.
Common configurations include single-hole, centerset, and widespread. Measure the distance between the holes on your sink and ensure the new faucet fits these measurements.
How long does it take to install a kitchen faucet?
Installing a kitchen faucet typically takes about 1-2 hours, depending on your experience and the complexity of the faucet.
If you're unfamiliar with plumbing, it may take longer. Having all the necessary tools and materials on hand can speed up the process.
Is installing a kitchen faucet difficult? Do I need to hire a plumber?
Installing a kitchen faucet is a manageable DIY project for those with basic plumbing knowledge.
However, if you encounter issues such as rusted parts or complex connections, hiring a professional plumber might be the best option. A plumber ensures a secure and leak-free installation, saving you potential headaches down the road.
How do I determine the correct size faucet for my sink?
To determine the correct size faucet for your sink, measure the distance between the pre-drilled holes.
This measurement will guide you in selecting a faucet that fits your sink's configuration. Additionally, consider the faucet's height and reach to ensure it suits your kitchen needs.
How do I maintain my new faucet after installation?
Maintaining your new faucet involves regular cleaning to prevent mineral buildup and corrosion. Wipe down the faucet with a soft cloth after use to prevent water spots.
Avoid using harsh chemicals or abrasive cleaners, as they can damage the faucet's finish. Periodically check for leaks and tighten connections as needed to ensure longevity.
Final Thoughts
Replacing a kitchen faucet is a rewarding DIY project that can instantly update the look and function of your kitchen. By following the step-by-step guide and tips provided, you can successfully change your kitchen faucet with minimal hassle.
Remember to gather all the necessary tools and materials, and take your time during the installation process. With a little effort, you can enjoy the benefits of a new, fully functional faucet.
More Reading


Request Free Quote Today!
Jabra Sanitary is a manufacturer of high-quality sanitary ware based on innovative technology. We are always ready to help with your building and infrastructure projects.
Please leave your contact details below, and we'll get back to you within 8 business hours to discuss your needs.
Stay Updated With Our Latest News & Products
© 2025 Jabra Sanitary Ware. All Rights Reserved.
Products
Contact Info
-
 inquiry@jabrasanitary.com
-
 +8613829077699
-
 +8613829077699
-
 No. 1, Zhenxing Road,
Chaoan District, Chaozhou City,
Guangdong Province, China