English

How to Remove and Replace a Toilet – A Complete Guide
March 31, 2025
Post Views: 113


Jabra Sanitary is a sanitaryware supplier offering toilets, sinks, faucets, bathtubs, etc., at competitive prices. If you're a distributor, wholesaler, or project contractor, get a quote today!
 $23.9 Limited-time Offer
- Consignment Policy
- 20 Years of Experience
Are you tired of dealing with an old, inefficient toilet that's not cutting it anymore? Or maybe your toilet is leaking or wobbling, and it's time to replace it? Whatever your reason for replacing your toilet, we've got you covered.
Removing a toilet isn't as complicated as it may seem. With some basic plumbing knowledge, the right tools, and a little elbow grease, you can have your old toilet removed and a new one installed in no time.
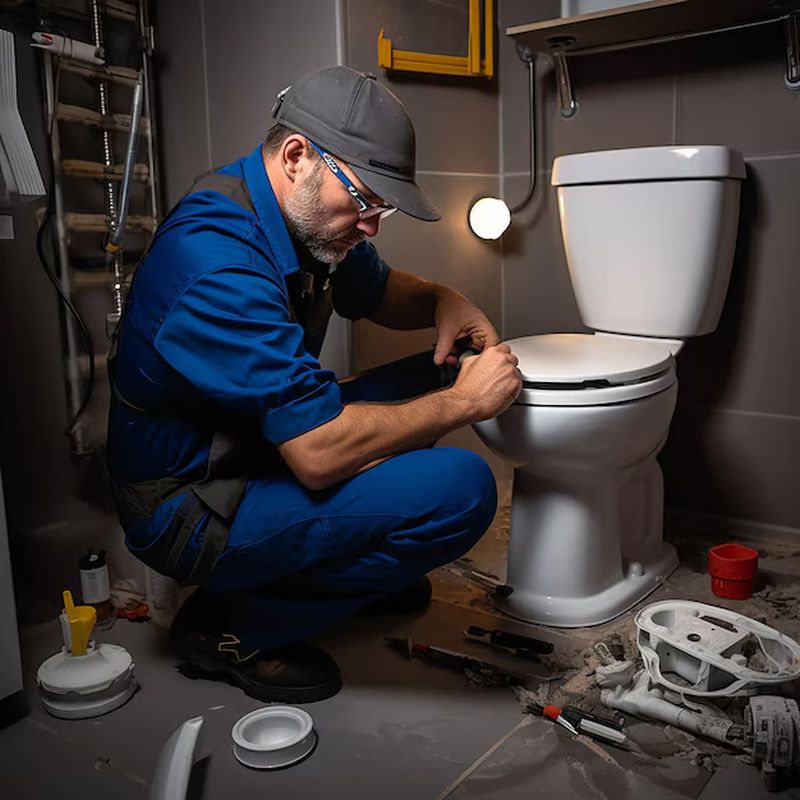
Table of Contents
Preparation - Before You Begin
Tools and Materials You'll Need to Remove a Toilet
How to Remove and Replace a Toilet
Dealing with Common Toilet Removal Problems
When to Call a Professional
How to Dispose of the Old Toilets
How to Install the New Toilet
Toilet Finishing Touches
How Long Does it Take to Replace a Toilet?
How Much Does it Cost to Install a Toilet?
FAQs
Conclusion
Preparation - Before You Begin
Before we examine the actual work, it's important to prepare your bathroom and gather the right tools. This initial step will make the entire process smoother and more efficient.
Start by clearing the area around your toilet. You don't want to trip over bath mats, cleaning supplies, or other bathroom items while you're working. Having a clear and spacious work area will make the process much easier and safer.
Once the space is ready, it's time to gather all the tools you'll need for the job.
Removing a toilet can be messy and heavy. So knowing what to do with it beforehand will save you time later.
Also, before you start, it's a good idea to plan how to dispose of the old toilet bowl. Look for a local waste removal pro or a recycling center that takes used toilets.
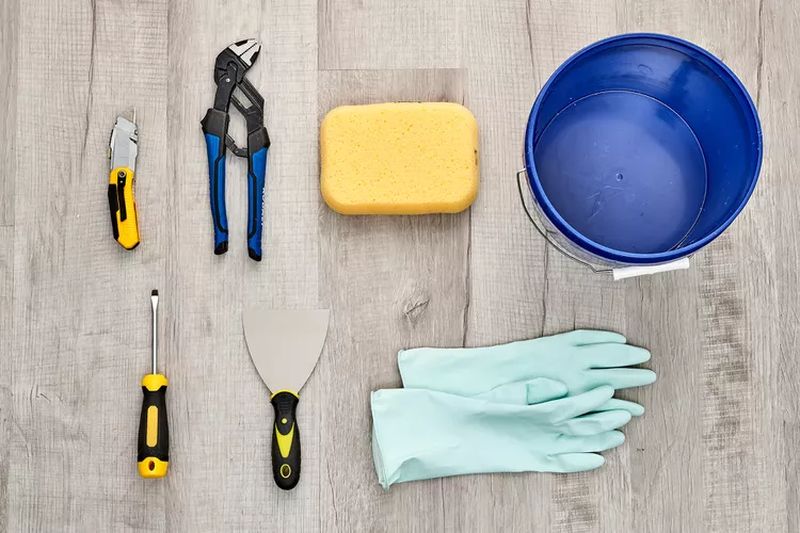
Tools and Materials You'll Need to Remove a Toilet
Before you start getting rid of the old toilet, it's important to gather all the tools and materials needed to replace a toilet. Having everything on hand will make the process go more smoothly.
Here's a list of what you'll need:
Tools
- 4-in-1 screwdriver – Essential for loosening screws and boltsustable wrench.
- Cordless drills – Speed up loosening and tightening bolts.
- Hacksaw – Useful for through any stuck bolts.
- Level – Ensure your new tostalled evenly.
- Locking pliers – Helpful for dealing with stubborn connections.
- Pliers – General tool for gripping and adjusting parts.
- Slip joint pliers – Great for disconnecting the water supply line.
- Utility knife – Used to cut through caulk around the base of the toilet.
Materials
- Rags and towels – Absorb any leftover water or debris.
- Bucket or container – Catch any water that spills when removing the toilet.
- Plastic gloves – Protect your hands from dirt and bacteria.
- Plastic bags – Dispose of old parts.
- Wax ring – A new wax ring is necessary to form at the seal when installing the new toilet.
- New supply line – Ensure your water line is properly connected to the new toilet.
- Johnny bolts and washers – These bold to secure the toilet to the floor.
- Putty knife or plastic scraper – Remove old residue from the flange.
How to Remove and Replace a Toilet
Removing and replacing a toilet may sound like a big job. But with the right steps, it can be manageable. Follow these steps carefully to ensure a smooth toilet removal and installation.
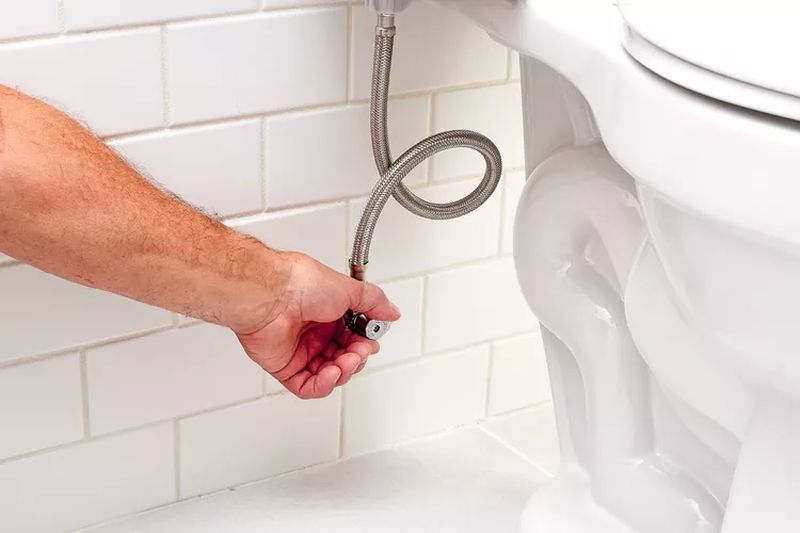
1. Turn Off the Water Supply
Before you do anything, it's important to turn off the water supply to the toilet. The shutoff valve is usually located near the base of the toilet. Turn it clockwise to close the valve and stop the water flow.
2. Drain the Toilet
Once the water is turned off, flush the toilet to drain out as much water as possible from the tank and bowl. Use a sponge or rag to soak up any remaining water from the tank and bowl, then wring it out into a bucket.
3. Disconnect the Water Line
Next, use an adjustable wrench or pliers to disconnect the water supply line from the bottom of the tank. Be ready for a little water to drip out when you disconnect it, so keep a towel or rag handy to catch any leaks.
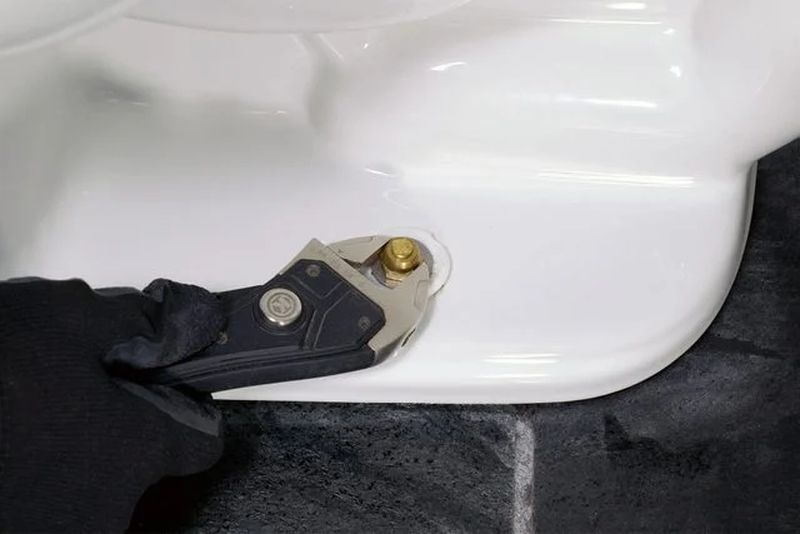
4. Loosen the Floor Bolts
To detach the toilet from the floor, you'll need to loosen the bolts securing it to the flange.
These bolts are typically covered by decorative caps. Once you remove the caps, use a wrench to loosen and remove the nuts from the bolts. If the bolts are rusted or stuck, you may need to use a hacksaw to cut them off.
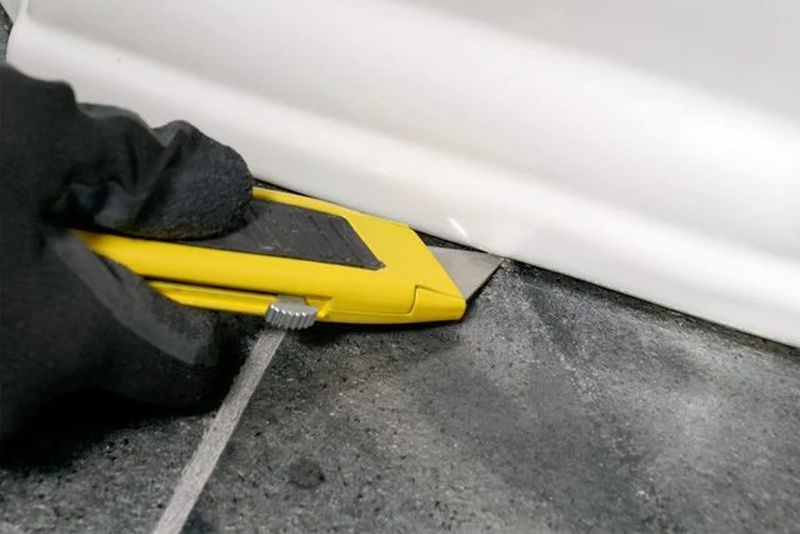
5. Cut Through the Caulk and Pull the Toilet Up
To uninstall the toilet, you'll need to cut through the caulk or silicone seal around the base of the toilet. A utility knife or putty knife works well for this.
After cutting the seal, gently rock the toilet back and forth to break the seal and pull it up from the flange. Be careful not to damage the flange or the floor.
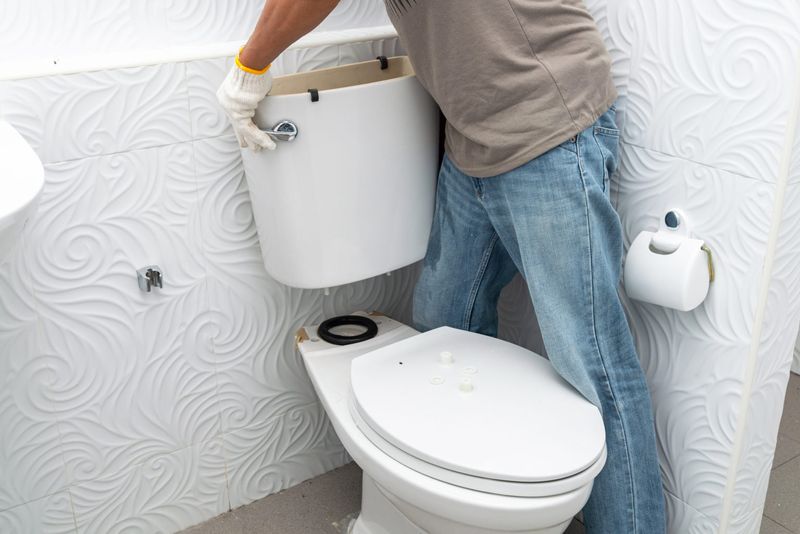
6. Remove the Toilet Tank (If Applicable)
If your toilet has a separate tank, it may be easier to remove it first before removing the toilet bowl. Use your wrench to unscrew the bolts securing the tank to the bowl.
Once the bolts are removed, carefully lift the tank off the bowl and set it aside.
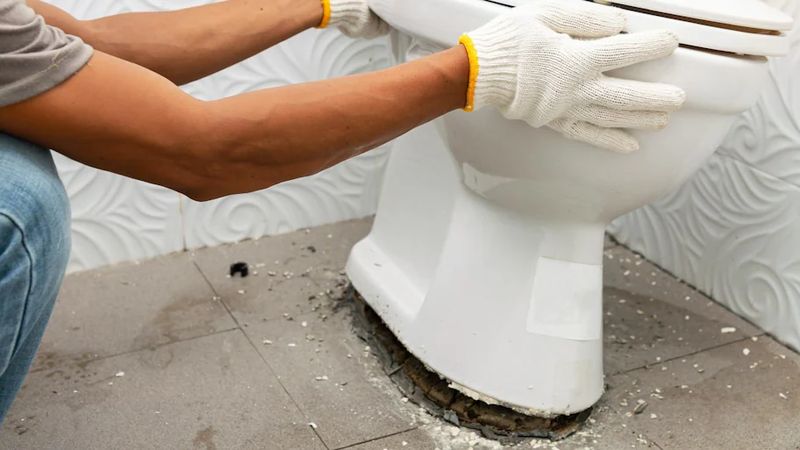
7. Remove the Toilet Bowl
Once the tank is removed, or if your toilet is one piece, lift the toilet bowl off the flange. This may take some effort, so make sure you have a good grip. Carefully set the bowl aside on a towel or rag to avoid damaging the floor.

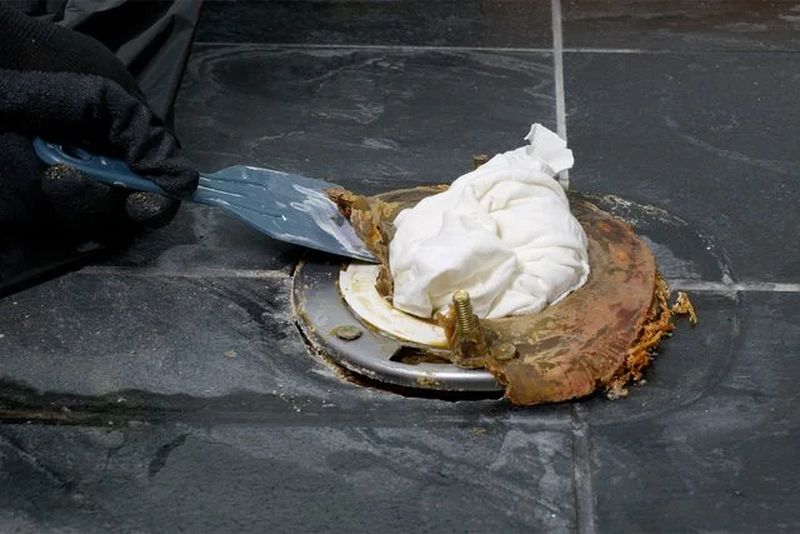
8. Clean Off the Flange
Now that the toilet is removed, it's time to clean the flange. The flange is the pipe fitting that connects the toilet to the drain pipe.
Remove any old wax ring residue and dirt. A plastic scraper or putty knife is useful for cleaning the area. Make sure the flange is in good condition before you install the new toilet.
9. Clean Up the Area
Before installing the new toilet, take a moment to clean the surrounding area. Sweep up any dust or debris and mop the floor if necessary. This ensures a clean and fresh environment for your new toilet.
Dealing with Common Toilet Removal Problems
While uninstalling and replacing a toilet is generally a straightforward process, there are a few common issues that may arise. Here are some solutions to the problems you might encounter:
1. Persistent Leaks
If you notice that water is still leaking around the base of the toilet after removal, it could be due to a few reasons:
- Old Wax Ring: Make sure you replace the wax ring with a new one. Old or damaged wax rings can cause leaks.
- Damaged Flange: Check if the flange is cracked or broken. If so, it may need to be replaced or repaired.
- Improper Seal: Ensure the toilet is seated properly on the flange, and that the bolts are securely tightened to create a tight seal.
2. Uneven Base
An uneven toilet base can cause it to wobble, leading to discomfort and potential leaks. To fix this:
- Shim the Base: Use plastic shims to level the toilet. Place the shims under the toilet's base and tighten the bolts. Be sure not to overtighten the bolts, as this could crack the toilet.
- Check the Floor: If the floor beneath the toilet is uneven, you may need to adjust the floor or replace the flooring before installing the new toilet.
3. Weak Flush
A weak flush can be frustrating and may indicate a clog or issue with the toilet's internal components. If your toilet is already removed, check for the following:
- Clogged Pipes: If the toilet bowl was clogged before removal, there might still be debris in the drain pipes. Use a plunger or drain snake to clear the pipes.
- Faulty Flapper Valve: If you're reinstalling a tank, the flapper valve inside the tank could be damaged or misaligned. Make sure the flapper is properly seated and functioning correctly.
4. Rusty or Stuck Bolts
Old or rusted bolts can make removing the toilet challenging. Here are some ways to deal with them:
- Apply Penetrating Oil: Before attempting to remove the bolts, spray them with penetrating oil (like WD-40) and let them sit for about 10-15 minutes. This can help loosen rusted bolts.
- Use a Hacksaw: If the bolts are too stubborn to remove, use a hacksaw to carefully cut them off.
5. Can't Break the Wax Ring Seal
If the wax ring seal is particularly stubborn, it can make lifting the toilet more difficult. Try the following solutions:
- Gently Rock the Toilet: Use a gentle rocking motion to break the seal. Don't force it too hard, as this can damage the flange or floor.
- Use a Putty Knife: If the wax ring is still stuck, try running a putty knife around the edges to gently pry it loose. Be careful not to damage the flange while doing this.
By addressing these common issues early, you can ensure a smoother toilet removal and replacement process.
When to Call a Professional
While many people are able to remove and replace their toilets themselves, there are times when it's best to call in a professional plumber. Here are some situations where professional help might be necessary:
1. Broken or Damaged Flange
If the flange is broken or severely damaged, it may need to be replaced or repaired. Fixing a flange can be tricky and often requires specialized knowledge to ensure the new toilet is properly sealed. A professional plumber will know how to repair or replace the flange correctly.
2. Leaking Pipes or Water Supply Line
If you notice leaks around the water supply line or other plumbing components when you disconnect the toilet, it's a good idea to call a plumber. Leaking pipes can cause significant water damage if not addressed quickly. A plumber will have the expertise to fix these issues safely.
3. Stubborn Toilet Bolts
If you're having trouble removing rusted or stuck bolts, and other methods like using penetrating oil or a hacksaw haven't worked, a plumber can handle this with the right tools and experience. This is especially important if the bolts are corroded or rusted to the point where they could break or damage the floor.
4. Uneven or Broken Floor
If the floor beneath the toilet is cracked, damaged, or uneven, a plumber can assess the situation and help you fix or replace the floor before installing the new toilet. Improper flooring can cause instability in your toilet and lead to future problems.
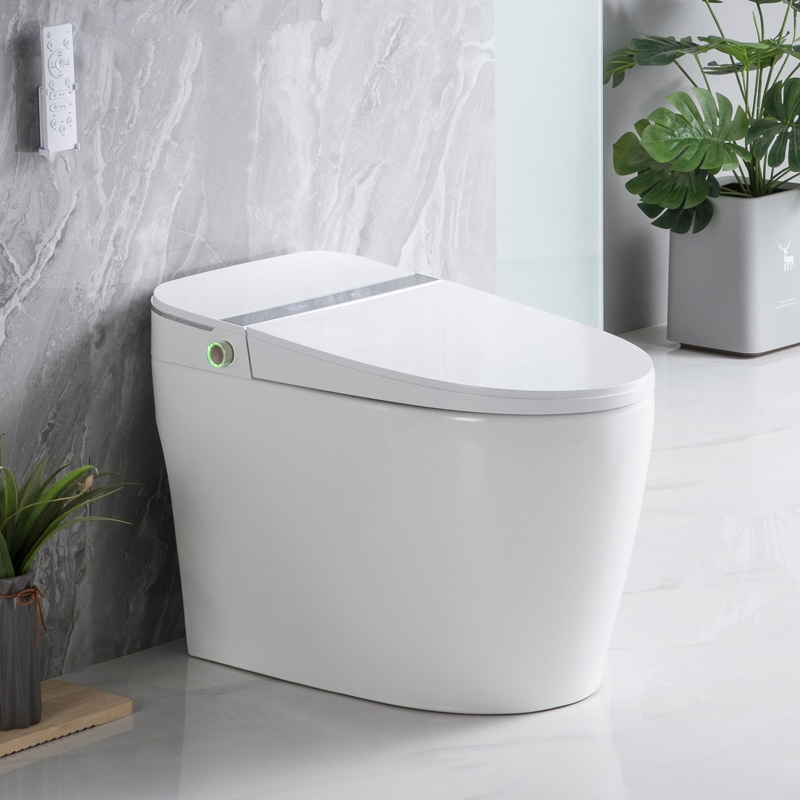
5. Complex Toilet Models
If you're dealing with a specialized or high-tech toilet model (such as a smart toilet), it's best to call a professional.
These types of toilets often have more complex installation requirements. A plumber will ensure they're installed correctly to avoid malfunction.
 Ads
Ads
Smart One Piece Toilet
Upgrade your bathroom experience with the one piece smart toilet J-2201 – the pinnacle of convenience and comfort in modern sanitaryware.
How to Dispose of the Old Toilets
Once you've removed your old toilet and installed the new one, it's time to dispose of the old toilet properly. Here are several ways to dispose of an old toilet bowl:
1. Drop Off at a Landfill Site or Dump
If you have access to a local landfill or waste disposal site, you can drop off the old toilet there.
Most landfills accept large items like toilets, but it's a good idea to check their specific guidelines before heading over. Some landfills may charge a fee for disposal.
2. Call for Local Trash Pickup
Some municipalities offer special bulk waste collection services, where large items like toilets can be picked up from your home.
Check with your local waste management service to see if they provide this service. Be sure to schedule a pickup in advance, as bulk waste pickup may not be available every week.
3. Look for a Local Waste Removal Pro
If you don't want to deal with hauling the toilet to a landfill or waiting for a scheduled pickup, you can contact a local waste removal professional. These services will pick up large items like toilets from your home for a fee, saving you time and effort.
4. Contact a Local Charity
If your old toilet is still in decent condition (but you're simply upgrading), consider donating it to a local charity or nonprofit. Some organizations may accept toilets for reuse or recycling. Be sure to call ahead and verify that they accept such donations.
5. Find a Porcelain Recycling Center
Toilets are made from porcelain, a recyclable material. Some recycling centers specifically accept porcelain toilets for recycling.
This is an environmentally friendly option, as the porcelain can be repurposed into new products. Research recycling centers in your area to see if they offer this service.
How to Install the New Toilet
Now that you've removed the old toilet and disposed of it properly, it's time to install your new toilet. Follow these steps to ensure the installation goes smoothly:
1. Inspect and Prepare the Flange
Before you install the new toilet, take a moment to inspect the toilet flange. This is the pipe fitting that connects the toilet to the drain pipe.
Make sure it's in good condition—if it's cracked or damaged, you'll need to replace it before proceeding. Clean the flange thoroughly to remove any old wax ring residue and debris.
2. Set the New Closet Bolts
Place the new closet bolts into the slots on the flange. These bolts will hold the toilet securely in place once it's positioned. Make sure the bolts are centered and parallel to the toilet's base to avoid alignment issues later.
3. Apply the Wax Ring
Next, apply a new wax ring to the flange. This ring will create a watertight seal between the toilet and the flange to prevent leaks.
Gently press the wax ring into place, ensuring it's centered on the flange. Some people prefer to place the wax ring on the toilet's outlet instead of the flange. But either method works as long as the ring is properly aligned.
4. Position the New Toilet
Carefully lift the toilet and align it with the closet bolts. Lower the toilet onto the wax ring, making sure that the bolts pass through the holes in the toilet's base.
Once the toilet is in position, apply gentle downward pressure to compress the wax ring and create a tight seal. Make sure the toilet is level, adjusting as necessary.
5. Secure the Toilet
Once the toilet is in position, use washers and nuts to secure the toilet to the closet bolts. Tighten the nuts gradually and evenly, making sure the toilet is firmly attached to the floor. Avoid overtightening, as this can crack the toilet or damage the flange.
6. Reconnect the Water Supply
Reconnect the water supply line to the bottom of the toilet tank. Use an adjustable wrench to tighten the connection. But be careful not to overtighten, as this can damage the water supply line or the toilet's connection.
7. Check for Leaks
Turn on the water supply and flush the toilet a few times to check for leaks. Inspect the area around the base and the water supply connection for any signs of leaks.
If you notice any leaks, tighten the bolts or connections as needed. If the toilet is properly installed, there should be no leaks, and the toilet should sit securely on the floor.
Toilet Finishing Touches
Once your new toilet is installed and you've checked for leaks, there are a few final steps to complete the job. These finishing touches will ensure your toilet is fully functional and looks great in your bathroom.
1. Install the Toilet Seat
The toilet seat is the final part to install on your new toilet. Start by aligning the seat with the holes at the back of the toilet bowl.
Insert the bolts into the holes and tighten the nuts to secure the seat. Be sure not to overtighten, as this can crack the seat or the toilet itself. Check to make sure the seat opens and closes smoothly.
2. Caulk the Base
To give your toilet a clean, finished look and prevent any water from seeping under it, apply a bead of caulk around the base of the toilet where it meets the floor.
Use a caulk gun to apply the caulk evenly. Smooth it with your finger or a caulk-smoothing tool. Be sure to leave a small gap at the back of the toilet to allow any water to escape if it does happen to leak.
3. Check the Flush
Once everything is installed, do a final test by flushing the toilet several times. Check that the flush is strong and that water is flowing properly.
Make sure the toilet refills correctly after each flush and that there are no issues with the flush mechanism.
How Long Does it Take to Replace a Toilet?
Replacing a toilet is a project that most DIYers can complete in about 2 to 4 hours. But the exact time it takes can vary based on several factors.
Here's a general idea of how long the process might take:
- Removing the old toilet: 30 to 45 minutes
- Preparing the area and flange: 30 minutes to 1 hour
- Installing the new toilet: 1 to 1.5 hours
- Final checks and cleanup: 30 minutes

Factors that Can Affect the Time:
- Experience Level: If you're a first-time DIYer, the process may take longer as you become familiar with each step. Experienced plumbers or DIYers can usually complete the job more quickly.
- Flooring and Toilet Type: If your floor is uneven or you have a unique toilet model, you may need extra time for adjustments or troubleshooting.
- Flange Issues: If the toilet flange is damaged or needs replacing, this can add additional time to the project.
- Tools and Materials: Having all the right tools and materials on hand before starting the job will help speed up the process.
How Much Does it Cost to Install a Toilet?
The cost of installing a toilet can vary depending on several factors, including whether you're doing it yourself or hiring a professional plumber. Here's a breakdown of the costs you can expect.
1. DIY Toilet Installation Costs
If you decide to tackle the installation yourself, your costs will mainly be for the new toilet and the materials needed for the installation. Here's an estimate of the costs:
- New Toilet: The cost of a new toilet can range from $100 to $500 or more, depending on the brand, style, and features. Basic models are on the lower end of the price range, while high-end models or smart toilets with extra features can be more expensive.
- Wax Ring and Seal: Typically cost around $5 to $10.
- Toilet Seat: If not included with the toilet, a new toilet seat can range from $15 to $50.
- Tools and Materials: If you don't already have the necessary tools (like wrenches, screwdrivers, etc.), you might need to purchase them. Tool costs can vary widely but expect to spend anywhere from $20 to $100 for basic tools.
In total, the DIY installation could cost you anywhere from $120 to $600 or more, depending on the toilet and tools you already own.
2. Professional Installation Costs
If you decide to hire a professional plumber for the job, the cost will increase due to labor charges. Here's what you can expect:
- Labor Costs: Plumbers typically charge between $150 and $300 for toilet installation, depending on your location and the complexity of the job.
- Additional Costs: If the plumber needs to replace the toilet flange, fix any plumbing issues, or make adjustments to the floor, the price could go up. Additional repairs or parts can add $50 to $150 or more to the total cost.
Overall, hiring a professional to install your toilet will likely cost you between $250 and $500, including labor and materials.
3. Other Considerations
- Disposal Fees: If the plumber removes and disposes of your old toilet, you may incur an additional fee, typically between $20 and $50.
- Water Supply Line Replacement: If the water supply line needs to be replaced, expect an additional cost of $10 to $30 for the part, plus labor.
In summary, whether you choose a DIY approach or hire a professional, toilet installation costs can range from $120 to $600 or more.
FAQs
Here are some frequently asked questions about removing and replacing a toilet, along with their answers:
1. Can I have a toilet without a drain?
No, every toilet needs a drain to carry waste and water away from the bowl. The drain pipe leads to your home's sewage system or septic tank.
Without a drain, the toilet wouldn't function properly, and waste wouldn't be able to leave the bowl.
2. How do you remove a commercial toilet?
Removing a commercial toilet follows the same basic steps as standard toilet removal. The primary difference is that commercial toilets are usually larger and may have different plumbing connections.
You'll still need to:
- Turn off the water supply
- Disconnect the water line
- Remove any bolts securing the toilet to the floor
- Use a utility knife to cut through any caulk or seal around the base
- Lift the toilet off carefully
3. Which is better, a toilet wax ring or a rubber?
Both wax rings and rubber seals are commonly used to create a watertight seal between the toilet and the flange. Each has its benefits:
- Wax Rings: These are the most common choice and provide a reliable, long-lasting seal. They're inexpensive and easy to work with.
- Rubber Seals: These are a more modern alternative. They are reusable, easy to install, and don't create a mess when removing the toilet.
Ultimately, the choice depends on your personal preference. But most people prefer wax rings for their proven effectiveness.
4. How to check if a wax ring is leaking?
If you suspect a leaking wax ring, look for signs of water around the base of the toilet. You may notice a damp spot or pooling water. You can also use a piece of tissue or toilet paper around the base to see if it becomes wet after a few uses.
5. Do you have to replace a wax ring every time you lift the toilet?
Yes, it's generally recommended to replace the wax ring every time you lift the toilet. The wax ring can become compressed and lose its sealing ability after the toilet is removed.
Replacing the wax ring ensures a proper seal when reinstalling the toilet and helps prevent leaks. If you're unsure, it's always better to err on the side of caution and replace the wax ring to avoid potential leaks down the road.

Conclusion
Removing and replacing a toilet may seem like a daunting task. But with the right preparation, tools, and knowledge, it can be a manageable DIY project.
Whether you're upgrading your toilet or simply getting rid of an old toilet, following the steps outlined in this guide will help ensure a smooth and successful installation.
If you have any doubts or prefer to leave it to the experts, don't hesitate to call a plumber for assistance. Get in touch with Jabra Sanitary for a free quote and expert help with your toilet replacement! The most reliable solution for disassembling a toilet and installing a new one is just a click away!
More Reading


Request Free Quote Today!
Jabra Sanitary is a manufacturer of high-quality sanitary ware based on innovative technology. We are always ready to help with your building and infrastructure projects.
Please leave your contact details below, and we'll get back to you within 8 business hours to discuss your needs.
Stay Updated With Our Latest News & Products
© 2025 Jabra Sanitary Ware. All Rights Reserved.
Products
Contact Info
-
 sales@jabrasanitary.com
-
 +8618151961957
-
 +8618151961957
-
 No. 1, Zhenxing Road,
Chaoan District, Chaozhou City,
Guangdong Province, China