English

How to Install a Toilet – Say Goodbye to Paying for Plumbers
February 19, 2025
Post Views: 251


Jabra Sanitary is a sanitaryware supplier offering toilets, sinks, faucets, bathtubs, etc., at competitive prices. If you're a distributor, wholesaler, or project contractor, get a quote today!
 $23.9 Limited-time Offer
- Consignment Policy
- 20 Years of Experience
Do you want to hire plumbers for a job that you can tackle yourself? If the answer is NO, you should learn how to install a toilet by yourself. Installing a toilet is not daunting. With the right tools, a little guidance, and some confidence, you can easily do it on your own.
We'll show you step-by-step instructions on how to install a toilet and some maintenance tips. This guide is designed for homeowners who want to save money, gain some DIY expertise, and ensure their plumbing is done right.
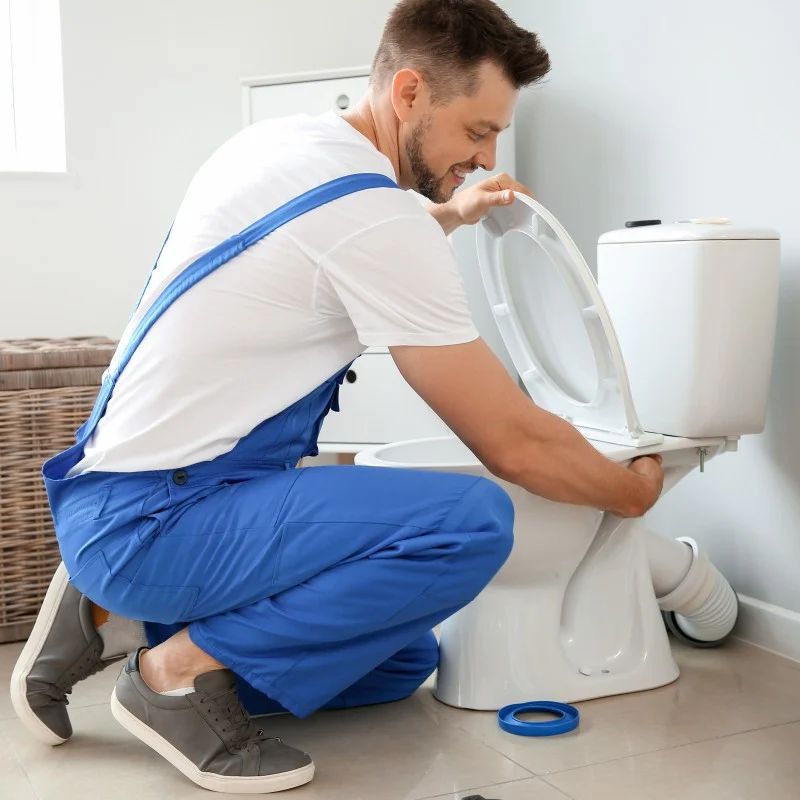
Table of Contents
Materials Needed to Install a Toilet
Safety Considerations When Installing a Toilet
How to Install a Toilet in Just One Hour: Step-by-Step
Additional Tip: Remember to Be Mindful of Your Local Plumbing Codes
When to Call a Professional
Toilet Installation Troubleshooting
How to Maintain Your Newly Installed Toilet
Identify if Your Toilet Needs Replacement
FAQs
Conclusion
Materials Needed to Install a Toilet
Before going to the installation process, gathering all the materials and tools you'll need is essential. Being prepared saves time and ensures a smoother experience. Here's a checklist to get you started:
Tools
- Adjustable wrench
- Screwdriver set
- Putty knife (to remove the old wax ring)
- Level (to ensure the toilet is even)
- Bucket and sponge (to handle any leftover water)
- Tape measure
Materials
- New toilet (bowl, tank, and seat included)
- Wax ring (or a wax-free seal option)
- Closet bolts (often included with the toilet)
- Flexible water supply line
- Plumber's putty or silicone caulk

Optional Items
- Work gloves (to protect your hands)
- Old towels or rags (for cleanup)
- Toilet shims (for uneven floors)
Safety Considerations When Installing a Toilet
Before beginning your toilet installation project, it's important to prioritize safety. While this task is relatively straightforward, taking a few precautions will help you avoid accidents.
Here is a breakdown:
Ensure Proper Ventilation
If you're using adhesives or caulking, make sure the bathroom is well-ventilated to prevent the buildup of fumes. Open windows or use a fan if needed.
Keep the Work Area Clean and Dry
A wet or cluttered work area can be slippery and hazardous. Clear the bathroom of any unnecessary items and ensure the floor is dry before starting.
Turn Off the Water Supply
Always shut off the water supply to the toilet before removing or installing it. This prevents flooding or accidental water damage.
Use Proper Lifting Techniques
Toilets can be heavy and awkward to handle. Bend your knees and lift with your legs—not your back—to avoid injuries. If needed, ask someone for help.
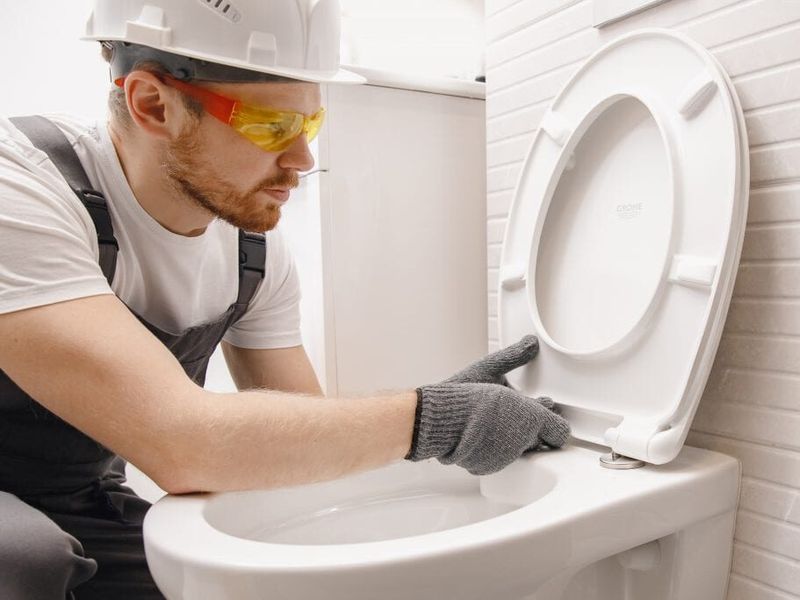
Wear Gloves to Protect Your Hands
Toilets and plumbing components can be messy, especially when dealing with the old wax ring or subfloor. Gloves help protect your hands from dirt, bacteria, and minor injuries.
How to Install a Toilet in Just One Hour: Step-by-Step
Now that you have your materials ready and safety precautions in place, let's get started with the step-by-step process of installing your new toilet.
Follow these simple instructions, and you'll have your toilet installed in one hour! However, if you encounter problems such as a damaged flange or uneven flooring, the installation may take longer.
Here is how to do it:
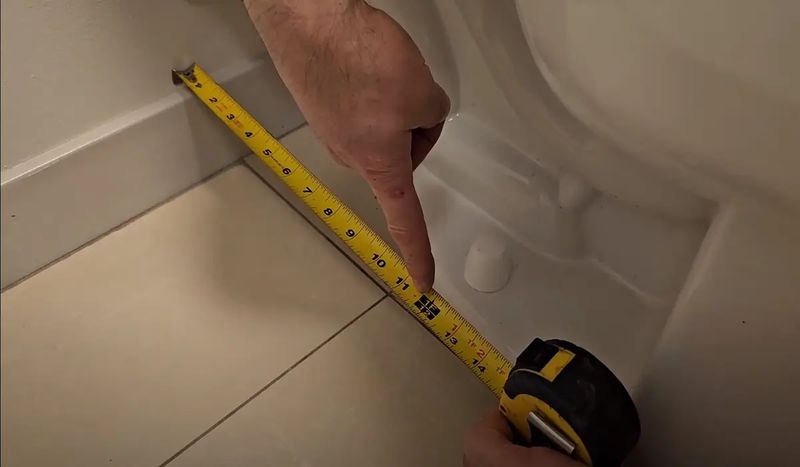
1. Measure for a New Toilet
Before purchasing your new toilet, measure the rough-in distance. This is the distance from the wall behind the toilet to the center of the toilet's flange bolts.
The standard rough-in size is typically 12 inches. But it can also be 10 or 14 inches depending on your bathroom setup.
2. Remove the Old Toilet
a. Disconnect the Water Supply
- Turn off the water supply valve located near the base of the toilet.
- Flush the toilet to empty the tank and bowl. Use a sponge or bucket to remove any remaining water.
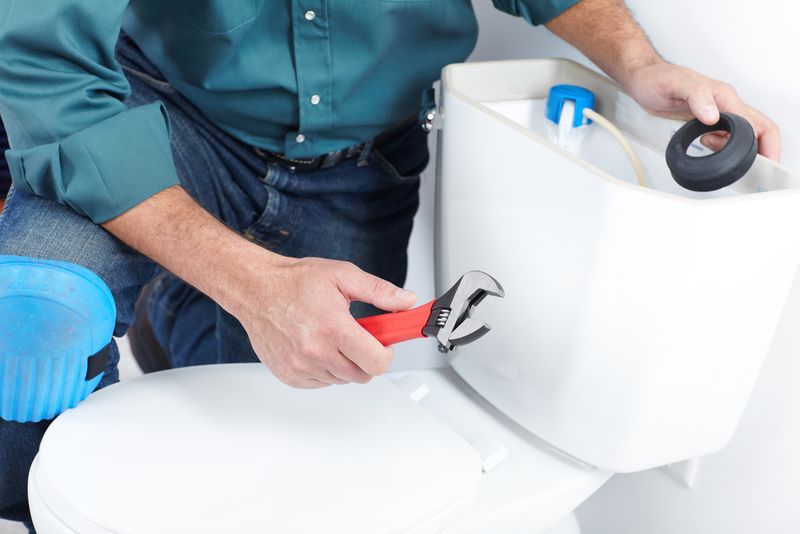
b. Remove the Tank and Bowl
- Unscrew the bolts connecting the tank to the bowl and lift it off carefully.
- Next, unscrew the nuts on the floor bolts securing the toilet bowl and lift the bowl straight up.
c. Remove the Old Wax Ring
- Use a putty knife to scrape away the old wax ring from the flange. Be thorough, as leftover wax can interfere with the new seal.
- Block the drain temporarily with a rag to prevent sewer gases from escaping.
3. Prepare the Bathroom Floor
a. Inspect the Subfloor
- Check the subfloor for any signs of water damage or rot. If necessary, repair or replace the affected areas before proceeding.
b. Install the Closet Flange
- If the existing flange is damaged, replace it with a new one. Ensure it is securely fastened to the floor and properly aligned with the drainpipe.
4. Install the New Toilet Bowl
a. Place the Wax Ring
- Turn the toilet bowl upside down and attach the new wax ring to the bottom of the bowl. Ensure it is centered and firmly pressed in place.
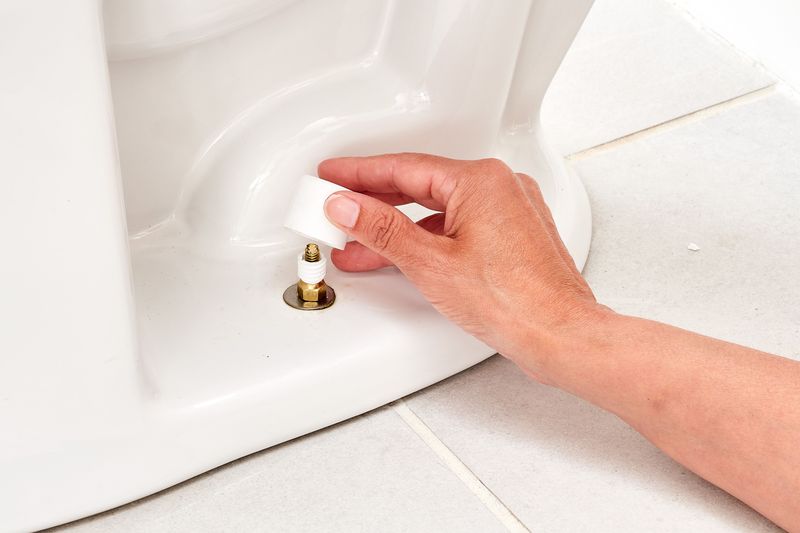
b. Position and Secure the Bowl
- Carefully lower the toilet bowl onto the closet flange, aligning the bolts with the holes in the base.
- Apply gentle pressure to compress the wax ring and create a seal. Tighten the bolts evenly to secure the bowl. But don't overtighten to avoid cracking the porcelain.
c. Attach the Toilet Tank
- Place the tank on the bowl, aligning the bolt holes.
- Secure the tank with the provided bolts and washers, tightening them evenly to prevent leaks.
d. Connect Tank to Bowl
- Attach the gasket and bolts connecting the tank to the bowl. Double-check for a snug fit.
e. Install the Flush Mechanism
- Follow the manufacturer's instructions to install the flushing mechanism inside the tank.
5. Final Steps
a. Connect the Water Supply and Test
- Reconnect the water supply line to the tank and open the water valve. Allow the tank to fill, then flush to test for leaks.
b. Attach the Supply Line
- Ensure the supply line is securely attached and free of leaks.
c. Test for Leaks
- Check all connections, including the base of the toilet, for leaks. Tighten bolts or fittings as necessary.
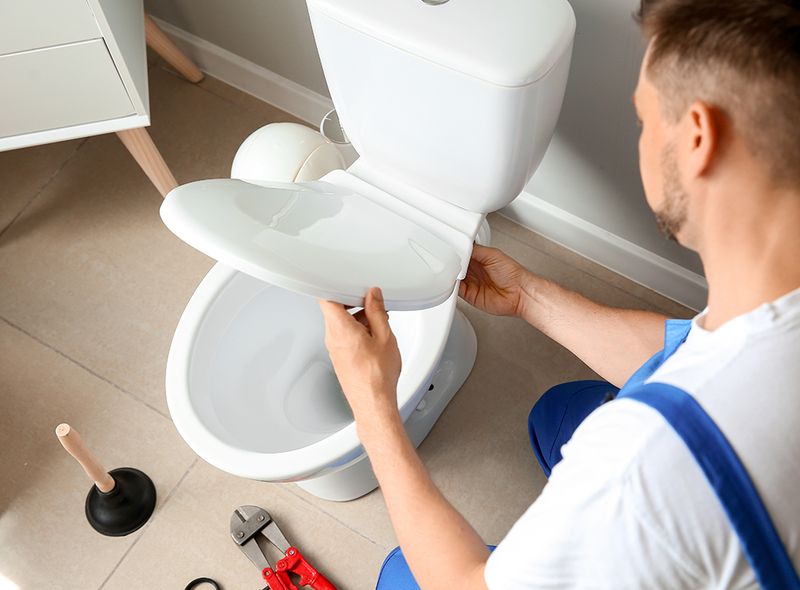
d. Add the Toilet Seat
- Secure the toilet seat to the bowl with the provided screws. Adjust as needed for proper alignment. <Also learn how to install a bidet>
e. Caulk the Toilet to the Floor
- Apply a bead of caulk around the base of the toilet where it meets the floor. This helps prevent movement and keeps debris from collecting under the bowl.
Additional Tip: Remember to Be Mindful of Your Local Plumbing Codes
When it comes to how to install a toilet, it's crucial not to overlook your local plumbing codes. There are regulations in place designed to ensure everything works efficiently and safely:
Pipe sizes and materials – Ensure the pipes are of the right size and material for proper waste removal.
Proper venting – Vent pipes are essential for maintaining the pressure in the plumbing system. Local codes dictate how they must be installed.
Toilet placement – Codes may specify how far toilets should be from walls, other fixtures, or other plumbing lines.
When installing a toilet in Australia, you should keep in mind that all plumbing systems, including toilet suites and other products with WaterMark certification, need to be installed by a licensed plumber.
Water conservation – Some regions have stricter water conservation rules that can influence the type of toilet you install (such as low-flow or dual-flush models). From 23 March 2025 In Australia, all toilets must be dual flush and have a minimum 3-star WELS rating.
When to Call a Professional
While installing a toilet can be a DIY-friendly project, there are certain situations where it's best to call a professional plumber.
Recognizing when you need expert help will save you time, money, and potentially costly mistakes. Here are some scenarios where professional assistance might be necessary:
Complex Plumbing Issues
If your bathroom's plumbing system has complex issues, such as outdated pipes, improper venting, or incorrect flange installation, it's best to call a professional.
Plumbers have the tools and expertise to troubleshoot and fix these issues safely. Trying to fix plumbing problems on your own can result in water damage or an inefficient system.
Uneven Floors or Sloping Subfloor
If your bathroom floor is uneven or your subfloor is damaged, it can be difficult to secure your new toilet properly.
An uneven floor can cause the toilet to wobble, leading to leaks or potential damage over time. A plumber can address the issue by leveling the floor or replacing the subfloor. It ensures a stable base for your toilet installation.
Issues with the Toilet Flange
The toilet flange connects the toilet to the waste pipe and anchors it to the floor. If your old flange is damaged, corroded, or improperly installed, you may have trouble securing the new toilet.
A plumber can replace or repair the flange, ensuring everything is properly sealed and connected.
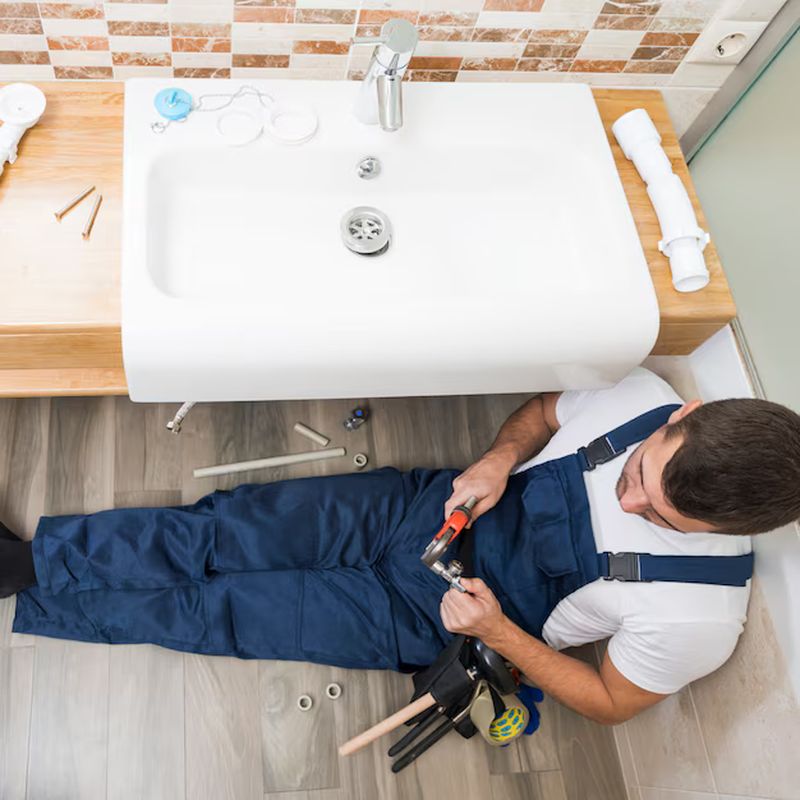
Water Supply Line Problems
If you notice issues with your toilet's water supply line, such as leaks or difficulty connecting the line to the tank, it might be time to call a plumber. In some cases, the water pressure could be too high or too low, or the supply line may need to be replaced to ensure a secure connection.
Persistent Leaks After Installation
Even after you've installed your toilet, leaks can occur. If you've followed all the steps and still notice water pooling around the base of the toilet, this could indicate a problem with the wax ring, the toilet flange, or the water supply line.
A plumber can quickly identify the source of the leak and make the necessary repairs.
Plumbing Code Violations
As mentioned earlier, local plumbing codes must be followed during toilet installation. If you're unsure about your work meeting code requirements or if your municipality requires a permit for toilet installation, it's best to call in a professional. This will prevent any legal issues or the need for costly corrections later.
Time Constraints
If you're on a tight schedule or simply don't feel comfortable taking on the installation yourself, hiring a professional plumber can save you time. Additionally, their expertise guarantees the job will be done right the first time.
Toilet Installation Troubleshooting
Even with careful planning, sometimes things don't go as expected during a toilet installation. Fortunately, most common problems have simple solutions. Here are a couple of issues you may encounter and how to fix them:
Dealing with Uneven Floors
One of the most common issues during toilet installation is an uneven floor. If the floor is not level, the toilet can wobble, which might cause leaks or make the toilet uncomfortable to use.
How to fix it:
- Use a Toilet Shim: A shim is a small wedge that can be placed under the toilet to stabilize it. You can purchase pre-made toilet shims, or you can use a piece of wood or plastic.
- Level the Floor: If the floor is severely uneven, you may need to use a leveling compound to create a stable base. In more extreme cases, you might need to replace the subfloor.
Fixing a Rocking Toilet
A toilet that rocks or shifts when you sit down is not only annoying but can also lead to leaks over time. This is often caused by an uneven installation or a loose connection between the toilet and the floor.
How to fix it:
- Tighten the Bolts: First, check the bolts that hold the toilet to the floor. If they're loose, simply tighten them with a wrench. Be careful not to overtighten, as this could crack the porcelain.
- Check the Wax Ring: If the wax ring wasn't properly installed or is damaged, it could cause the toilet to rock. In this case, remove the toilet, replace the wax ring, and reinstall the toilet securely.
- Install a Toilet Shim: If the floor is uneven, adding a shim under the toilet may help stabilize it and prevent rocking.
How to Maintain Your Newly Installed Toilet
Once your toilet is installed, it's important to maintain it properly to ensure it continues to function well for years to come.
Here are some tips on how to keep your newly installed toilet in top condition:
Regular Cleaning Tips
- Clean the Bowl: Use a toilet brush and a good toilet cleaner to scrub the inside of the bowl regularly. Make sure to clean under the rim and around the edges. You can also use a pumice stone to gently remove any stubborn stains.
- Disinfect the Tank: The inside of your toilet tank can accumulate mineral deposits and bacteria. Periodically, add a toilet tank cleaner or a cup of vinegar to the tank, let it sit for a few hours, and then flush it out to keep it fresh.
- Wipe Down the Exterior: Clean the toilet seat, lid, and the base of the toilet with a disinfecting wipe or a mild cleaner. This will help remove dirt, grime, and bacteria that can accumulate over time.
- Deep Clean Regularly: Perform a deep clean once a month by scrubbing the toilet more thoroughly and ensuring every part is disinfected. This will help maintain a fresh and odor-free bathroom.
When to Replace Parts
Toilets are built to last, but certain parts will eventually wear out and need to be replaced.
Here are some key components to keep an eye on:
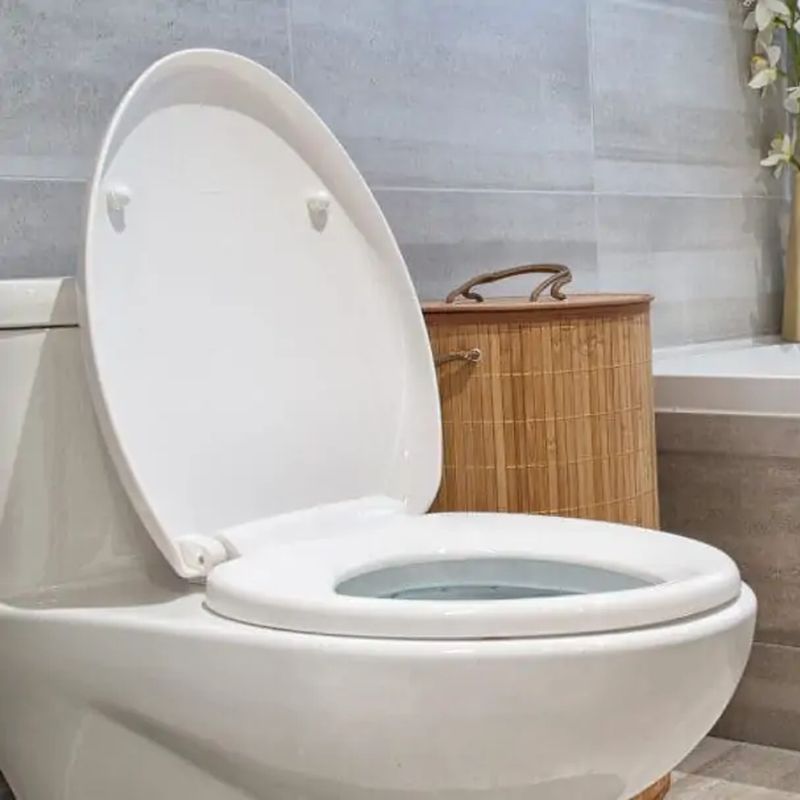
- Toilet Seat: The toilet seat can crack or become uncomfortable over time. If you notice damage or excessive wear, replacing the seat is an easy and inexpensive fix.
- Flush Mechanism: If the flush handle becomes loose or difficult to use, or if the toilet doesn't flush properly, it may be time to replace the flush mechanism. This includes the lever, chain, and flapper inside the tank.
- Fill Valve: The fill valve controls the water level inside the toilet tank. If you notice the toilet filling too slowly, or water running constantly, it could be a sign the fill valve is malfunctioning and needs replacement.
- Wax Ring: While wax rings are designed to last a long time, they can degrade or become damaged. If you notice water leaking around the base of the toilet, it could indicate that the wax ring needs replacing.
Identify if Your Toilet Needs Replacement
Even with the best care and regular maintenance, there comes a time when your toilet may need to be replaced. Here are some signs that your toilet might need replacement:
Persistent Clogs
If your toilet constantly clogs, even after using a plunger or auger, it could be a sign that the toilet is no longer functioning properly. Repeated clogs often point to:
- Old and inefficient flush mechanisms: Older toilets often don't flush as powerfully or effectively as newer models.
- Cracks in the toilet: A crack in the porcelain can disrupt the flow of water, causing waste to get stuck.
Cracks in the Porcelain
Cracks in the toilet's porcelain can be a serious issue. Not only can they lead to leaks, but they can also compromise the structural integrity of the toilet. Cracks can occur over time due to normal wear or from physical damage.
You should inspect your toilet for any visible cracks, especially around the base, tank, or bowl. If you spot any, it's best to replace the toilet immediately.
Significantly More Water Per Flush
If your toilet is older and uses more than 1.6 gallons per flush (GPF), it could be wasting water. It will not only increase your water bill but also contribute to environmental waste.
Modern toilets, especially low-flow models, are designed to be more water-efficient while still providing a strong flush.
FAQs
Here are some frequently asked questions about how to install a toilet, along with helpful answers to guide you through the process:
How long does it take to install a toilet?
The time it takes to install a toilet can vary depending on your experience and the condition of the existing plumbing. On average, a DIYer can install a new toilet in 1 to 2 hours.
If you're replacing an old toilet and there are no major plumbing issues, the process is usually quicker. However, if you encounter problems such as a damaged flange or uneven flooring, the installation may take longer.
How can I make sure a toilet is sealed properly?
Use a new wax ring when installing the toilet. This creates an airtight seal between the toilet and the flange, preventing leaks.
After installing the toilet, make sure it's securely fastened to the floor with bolts. You can also test for leaks by running water and inspecting the base for any signs of pooling water. If you notice any leaks, the wax ring may need to be replaced or the toilet may need to be reseated.
How do you inspect a toilet flange?
You can do it as follows:
- Check for cracks: Look for any visible cracks or damage to the flange. A cracked flange will need to be replaced.
- Ensure it's level: The flange should be level with the floor. If it's raised or uneven, it can cause issues with the toilet's seal.
- Check for secure attachment: The flange should be securely attached to the floor. If it's loose, you may need to reinstall it or replace it entirely.
Why is my new toilet supply line leaking?
A leaking toilet supply line can occur for several reasons:
- Loose connection: The water supply line may not be tightly connected to the toilet's fill valve or the shut-off valve. Tighten the connections with a wrench. But be careful not to overtighten.
- Damaged supply line: If the supply line is cracked or damaged, it will need to be replaced.
- Faulty valve: If the shut-off valve or fill valve is faulty, it may cause leaks. In this case, replacing the faulty part will solve the problem.
What is the average cost to install a new toilet?
The cost to install a new toilet can vary based on several factors, including the type of toilet, whether you're hiring a professional, and your location. On average:
- DIY installation: Installing the toilet yourself can cost between $150 to $400, including the price of the toilet, wax ring, and other necessary parts.
- Professional installation: Hiring a plumber to install the toilet can cost between $150 to $350 for labor, plus the cost of the toilet itself. If you're replacing plumbing or making repairs, the overall cost may increase.
Why does my toilet still wobble after installation?
A wobbling toilet after installation is usually caused by one of two issues:
- Uneven floor: If the floor isn't level, the toilet may wobble. You can use toilet shims to stabilize the toilet and correct any unevenness.
- Loose bolts: Ensure the bolts securing the toilet to the flange are tight.

Conclusion
Installing a toilet is a manageable DIY project that can save you money and improve your bathroom. By following the correct steps, using the right materials, and prioritizing safety, you can ensure your toilet is installed properly.
Always consider local plumbing codes, use proper lifting techniques, and take care of maintenance to extend the life of your toilet. However, if you face issues like leaks or uneven floors, don't hesitate to call a professional plumber.
More Reading

Request Free Quote Today!
Jabra Sanitary is a manufacturer of high-quality sanitary ware based on innovative technology. We are always ready to help with your building and infrastructure projects.
Please leave your contact details below, and we'll get back to you within 8 business hours to discuss your needs.
Stay Updated With Our Latest News & Products
© 2025 Jabra Sanitary Ware. All Rights Reserved.
Products
Contact Info
-
 sales@jabrasanitary.com
-
 +8618151961957
-
 +8618151961957
-
 No. 1, Zhenxing Road,
Chaoan District, Chaozhou City,
Guangdong Province, China