English

How to Install a One-Piece Toilet: A Complete DIY Guide
August 21, 2024
Post Views: 1779


Jabra Sanitary is a sanitaryware supplier offering toilets, sinks, faucets, bathtubs, etc., at competitive prices. If you're a distributor, wholesaler, or project contractor, get a quote today!
 $23.9 Limited-time Offer
- Consignment Policy
- 20 Years of Experience
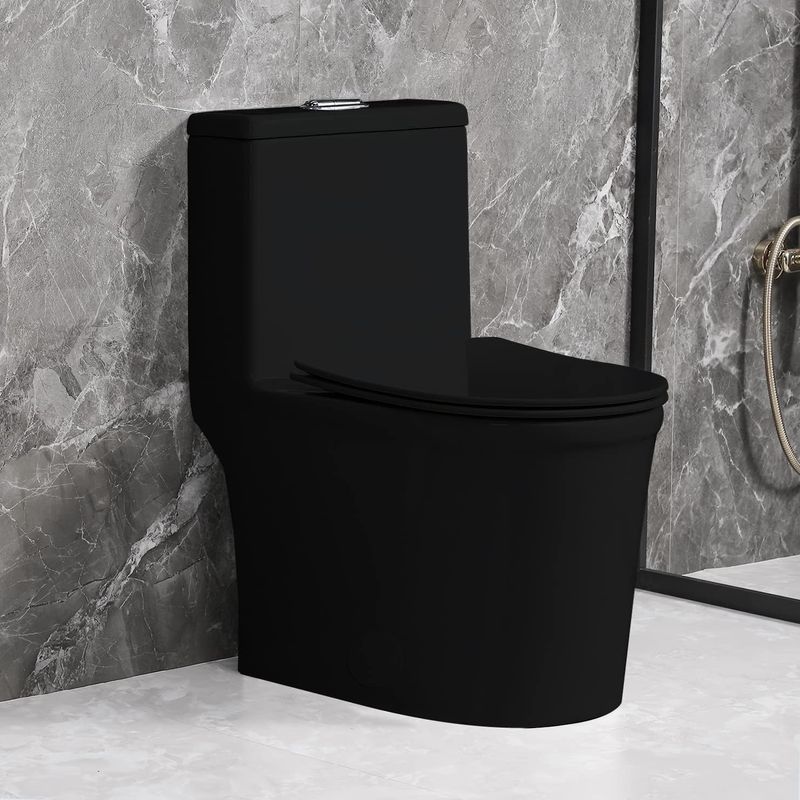
Installing a one-piece toilet is a task that many DIY enthusiasts can tackle with the right tools and knowledge. A properly installed toilet not only functions efficiently but also enhances the overall appearance of your bathroom.
This guide will walk you through the entire installing process, from preparation to final installation, ensuring that your new one-piece toilet is installed correctly and securely.
We'll also cover additional considerations like installing a bidet, attaching the toilet seat, and whether it's worth considering professional help.
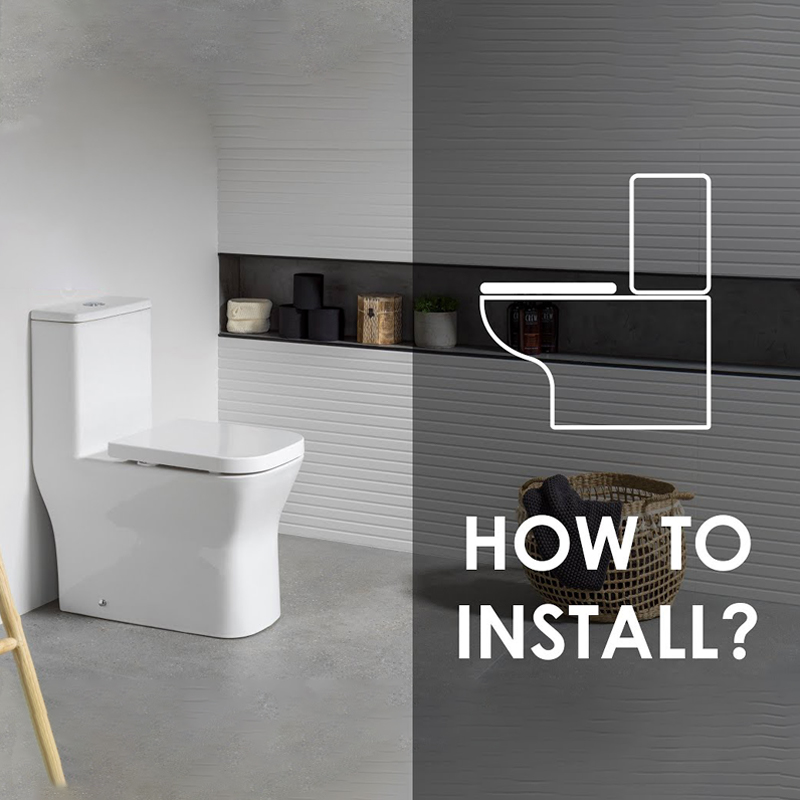
Table of Contents
Confirm the Measurements
Suggested Tools and Materials For Installing a One-Piece Toilet
Preparation Steps
How to Install a One Piece Toilet
Important Note Regarding Water Supply
DIY Toilet Installation Tips
FAQs
Conclusion
Before purchasing and installing your one-piece toilet, it's crucial to measure your bathroom space to ensure the new toilet will fit.
Rough-in distance: Measure the distance from the wall to the center of the drainpipe and confirm that it matches the specifications of your new toilet.
Jabra one-piece toilets, available in both 10 inch rough in toilet one piece and 12 inch rough in toilet, ensure versatile installation options, fitting seamlessly into any bathroom layout.
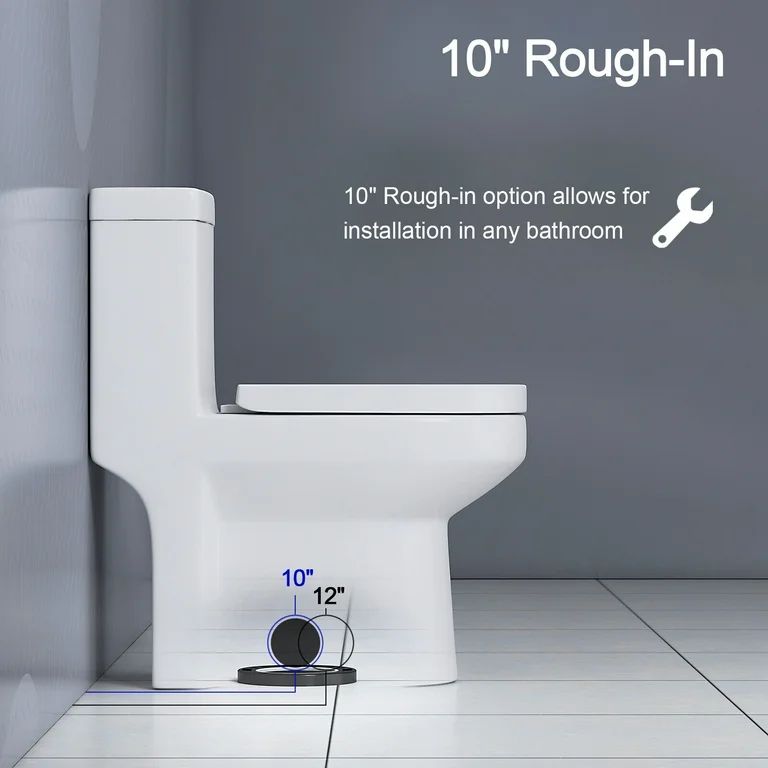
Toilet Dimensions: Consider the overall dimensions of the toilet to ensure it fits comfortably within your bathroom layout.
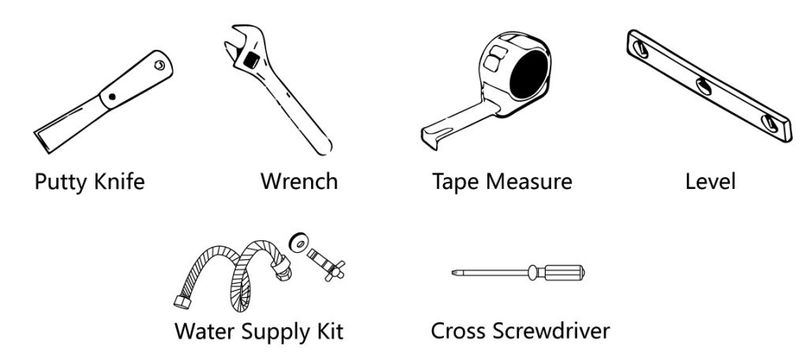
To successfully install your one-piece toilet, gather the following tools and materials:
- Adjustable Wrench
- Cross Screwdrivers
- Putty Knife
- Toilet bowl flange
- Wax Ring
- Level
- Tape
- Bucket and sponge (for water removal)
- Water Supply Kit
Having these items ready will make the installation process smoother and help you avoid unnecessary delays.
Preparation Steps
Shut Off the Water Supply
Start by locating the shut-off valve near your toilet, usually found on the wall behind the toilet. Turn the valve clockwise to shut off the water supply.
Once the water is off, flush the toilet to drain as much water as possible from the tank and bowl. Use a sponge and bucket to remove any remaining water to avoid spills during the installation.
Remove the Old Toilet
If you're replacing an old toilet, you'll need to remove it first. Start by disconnecting the water supply line from the toilet tank. Use a wrench to loosen the nuts securing the toilet to the floor bolts.
Carefully lift the old toilet off the bolts and set it aside. Be sure to inspect the flange for any damage and clean up any residue left from the old wax ring.
Check Existing Plumbing and Flange
Before installing the new toilet, inspect the existing plumbing and the toilet flange. Ensure the flange is level and securely attached to the floor.
If the flange is damaged or corroded, replace it with a new one to prevent future leaks. Double-check that the water supply line is in good condition and positioned correctly for the new toilet.
How to Install a One Piece Toilet
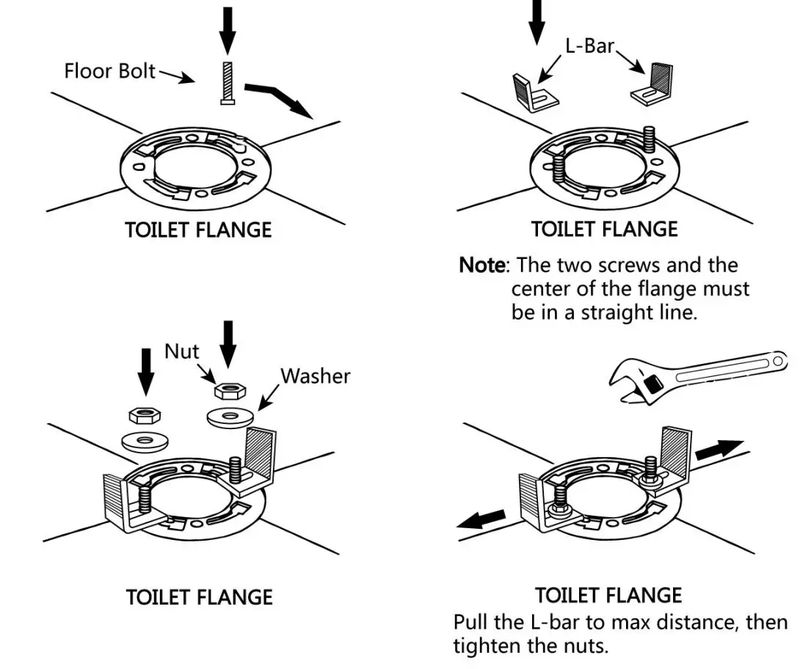
Step 1: Install the Floor Bolts and L-Bar
The toilet bowl flange is a crucial component that connects the toilet to the drainpipe and secures it to the floor.
How to install a new toilet bowl flange? Start by positioning it over the drainpipe, and aligning the bolt slots with the floor bolts.
Place the floor bolts into the flange slots, ensuring they are positioned upright and evenly spaced.
If your toilet requires an L-Bar for additional support, install it now by securing it to the flange according to the manufacturer's instructions.
The floor bolts and L-Bar provide stability and ensure the toilet is firmly anchored to the floor. A properly installed flange prevents leaks and keeps the toilet stable.
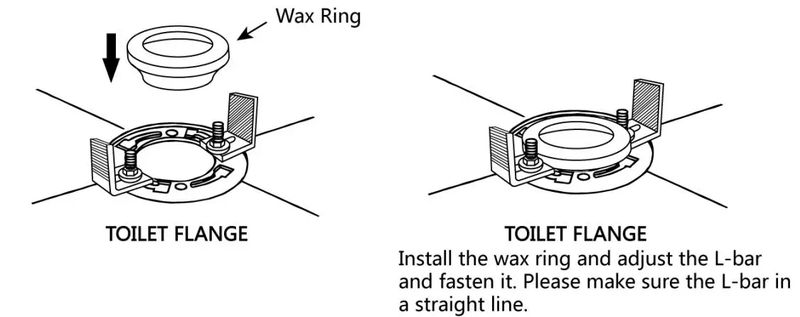
Step 2: Install Wax Ring
With the flange in place, it's time to install the wax ring. The wax ring creates a watertight seal between the toilet and the flange.
How do you put a wax ring on a toilet? You can place the wax ring on the bottom of the toilet bowl outlet or on the flange itself. Ensure it is centered and securely in place to prevent leaks.
Once the wax ring is positioned, carefully lower the toilet onto the flange, aligning the floor bolts with the holes in the toilet base.
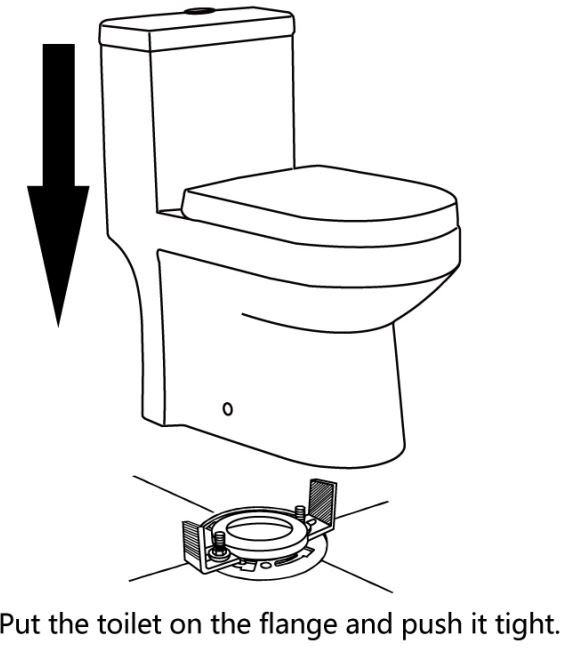
Step 3: Position and Install the Toilet
Carefully lift the toilet and position it over the flange, ensuring the floor bolts pass through the holes in the base of the toilet. Lower the toilet slowly, allowing the wax ring to compress and create a seal.
Once the toilet is in place, apply gentle pressure to seat it firmly on the floor. Attach the washers and nuts to the floor bolts, tightening them evenly with a wrench. Be careful not to overtighten, as this could crack the porcelain.
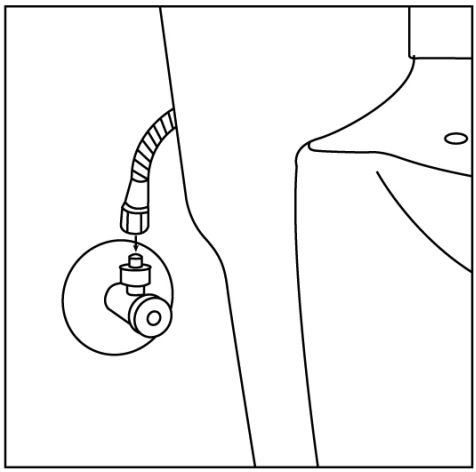
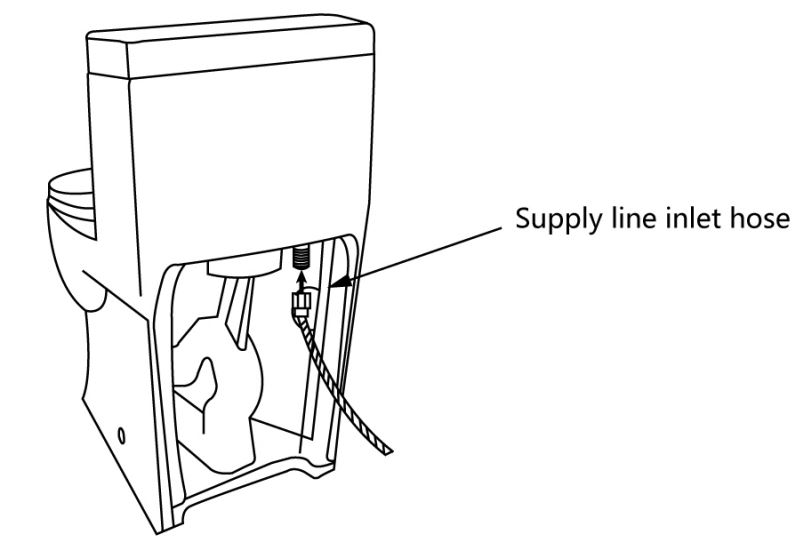
Step 4: Connect Supply Line
Next, reconnect the water supply line to the toilet's fill valve. Use Teflon tape on the threads of the valve to ensure a tight seal. Hand-tighten the connection, then use an adjustable wrench to give it an extra quarter turn.
Be careful not to overtighten, as this can damage the threads or cause leaks. Once connected, turn on the water supply to check for leaks.
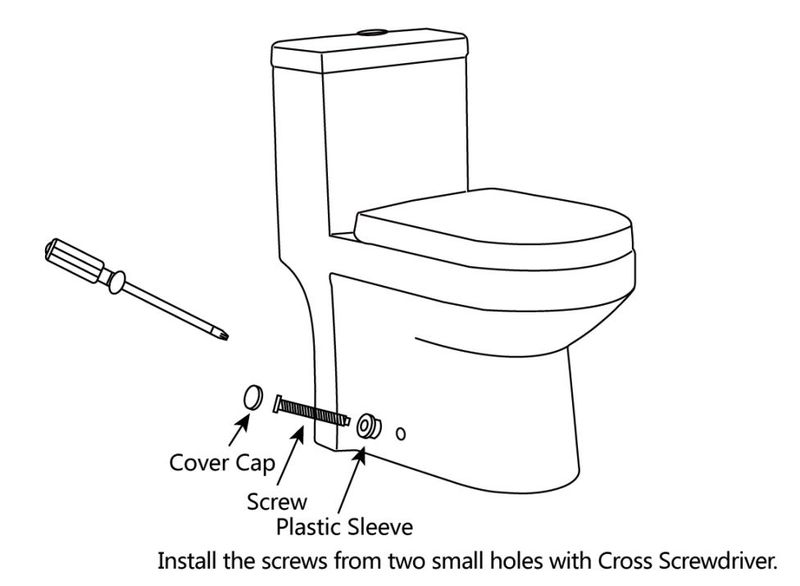
Step 5: Install Cover Cap and Tighten Bolts
Finally, install the decorative cover caps over the floor bolts to give the toilet a finished look. Tighten the bolts once more if necessary, ensuring the toilet is secure but not over-tightened.
The cover caps will protect the bolts from corrosion and add to the overall appearance of the installation.
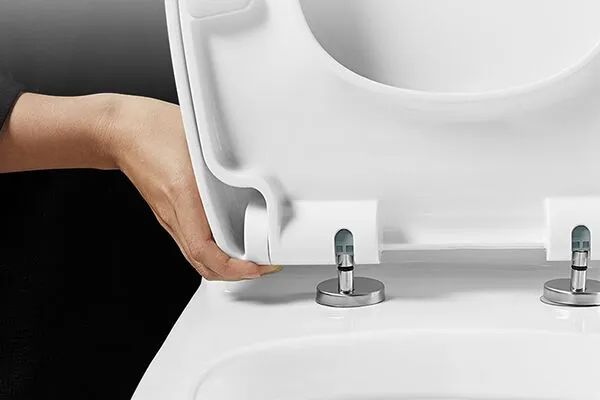
Step 6: One-Piece Toilet Seat Installation
Installing the toilet seat on a one-piece toilet is straightforward. Align the seat hinges with the mounting holes on the toilet bowl. Insert the bolts through the holes and hand-tighten the nuts underneath.
Some seats come with quick-release mechanisms for easy cleaning. Once the seat is in place, check that it opens and closes smoothly and is securely fastened.
Step 7: Install a Bidet on a One-Piece Toilet
As you continue your bathroom upgrade, consider exploring smart one-piece toilets with built-in bidet that offer advanced features like automatic flushing, bidet functions, and heated seats.
If you're installing a bidet on one piece toilet, this is the time to do it. Start by turning off the water supply again and disconnecting the supply line from the toilet.
Attach the bidet's T-valve to the toilet's fill valve, then reconnect the supply line to the T-valve. Follow the manufacturer's instructions to secure the bidet seat and connect the water line.
Once installed, turn the water supply back on and test the bidet for proper function.
Step 8: Toilet Bowl Assembly
For toilets with additional components, such as a built-in bidet or advanced flushing systems, follow the manufacturer's instructions to assemble the toilet bowl.
This may include connecting additional hoses, securing internal mechanisms, or installing electronic controls. Ensure all components are securely fastened and properly aligned before proceeding.
Important Note Regarding Water Supply
Checking for Leaks
Before finalizing the installation, it's crucial to check for any leaks in the water supply line and connections. Turn on the water supply slowly, allowing the tank to fill while you inspect the connections.
Check around the base of the toilet, the supply line connection, and the tank for any signs of water leakage. If you notice any leaks, tighten the connections as needed and recheck.
Ensuring Proper Water Flow
Once the toilet is installed and the water supply is turned on, test the toilet by flushing it a few times. Ensure that the water flow is consistent, and the toilet refills correctly.
Listen for any unusual sounds, which could indicate a problem with the installation. If everything is functioning properly, your installation is complete, and your new one-piece toilet is ready for use.
DIY Toilet Installation Tips
DIY Toilet Install vs. Professional Installation
Installing a one-piece toilet can be a rewarding DIY project, but it requires careful attention to detail and proper tools.
If you're comfortable with basic plumbing tasks and have experience with home improvement projects, DIY installation can save you money.
However, if you encounter challenges such as difficult plumbing conditions or uncertain measurements, it may be worth hiring a professional to avoid costly mistakes.
Professionals can ensure proper installation, including the correct positioning of the toilet, securing the flange, and leak-proof connections.
DIY Replace Toilet
If you're replacing an old toilet, the process involves more than simply removing the old unit and placing a new one. You'll need to check the condition of the existing plumbing, floor bolts, and toilet flange.
Replacing a toilet yourself allows you to upgrade your bathroom at a lower cost, but it's important to take your time during each step of the process.
Be sure to have all your tools and materials ready, and double-check each connection to ensure a smooth installation. For two piece toilets, you need to learn how to assemble a toilet tank.
Common Mistakes to Avoid
During installation, several common mistakes can lead to problems down the road. Avoid over-tightening the bolts, which can crack the porcelain.
Also, ensure the wax ring is properly centered to create a good seal; otherwise, leaks can occur.
Finally, always double-check that the toilet is level before tightening the bolts completely, as an uneven toilet can cause rocking and lead to future damage.
Ensuring the Toilet is Level and Stable
After positioning the toilet on the flange, use a level to ensure that it sits evenly on the floor. If the toilet is not level, it can cause leaks or an unsteady feel when in use. <Check leaking toilet tank troubleshooting>
If needed, use shims under the toilet to level it before tightening the bolts. Once leveled, secure the bolts evenly and test for any movement by gently pushing the toilet.
A stable toilet ensures longevity and prevents unnecessary repairs.
FAQs
How Long Does It Take to Install a One-Piece Toilet?
On average, it takes 2 to 4 hours to install a one-piece toilet, depending on your experience level and the condition of the existing plumbing.
If you need to replace the flange or make repairs, the process could take longer.
What is the Cost to Install a One-Piece Toilet?
The cost of installing a one-piece toilet varies based on location, labor rates, and whether you choose to hire a professional.
On average, professional installation can cost between $150 and $400, while DIY installation primarily involves the cost of the toilet and materials.
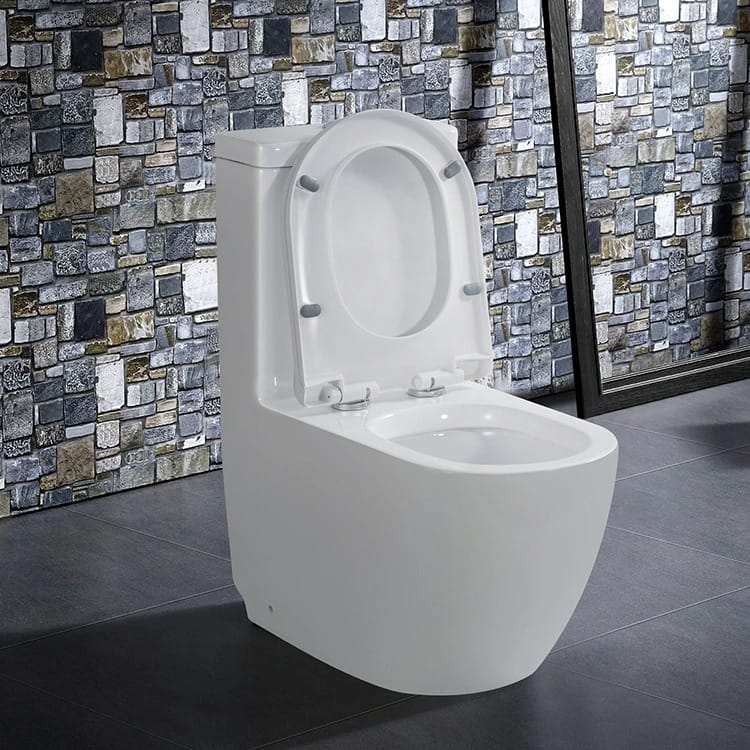
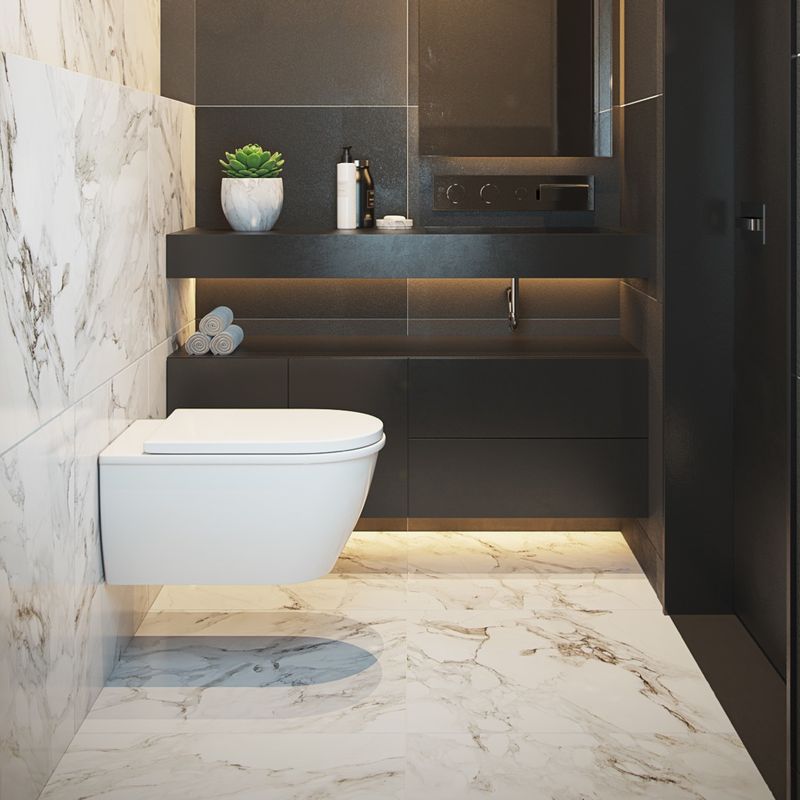
What Does One-Piece Toilet Mean?
A one-piece toilet is a design where the tank and bowl are molded together into a single unit. This reduces the number of joints and crevices, making the toilet easier to clean and providing a more streamlined look.
It also typically reduces the risk of leaks between the tank and bowl.
Are One-Piece Toilets Any Good?
One-piece toilets are known for their sleek design, ease of cleaning, and fewer crevices where dirt can accumulate.
They are generally considered a good option for modern bathrooms and are available in various styles and features, including water-saving models and smart toilet options.
Is it Better to Get a 1 Piece or 2 Piece Toilet?
The choice between a one-piece and a two-piece toilet depends on your needs. One-piece toilets are often easier to clean and have a more modern appearance, while two-piece toilets tend to be more affordable and easier to transport.
For those prioritizing aesthetics and ease of maintenance, a one-piece toilet is often the better choice.
Conclusion
Installing a one-piece toilet is a manageable task for those with basic DIY skills and the right tools. By following this step-by-step guide, you can ensure that your toilet is installed correctly.
Remember to carefully measure your space, double-check all connections, and take your time during the installation. Proper installation is key to avoiding future issues, such as leaks or an unsteady toilet.
If you encounter any difficulties during installation or feel unsure about any step, consider consulting a professional.
For more information on high-quality sanitary products, visit jabrasanitary.com, a trusted sanitary ware manufacturer that combines innovation with durability.
More Reading

Request Free Quote Today!
Jabra Sanitary is a manufacturer of high-quality sanitary ware based on innovative technology. We are always ready to help with your building and infrastructure projects.
Please leave your contact details below, and we'll get back to you within 8 business hours to discuss your needs.
Stay Updated With Our Latest News & Products
© 2025 Jabra Sanitary Ware. All Rights Reserved.
Products
Contact Info
-
 sales@jabrasanitary.com
-
 +8618151961957
-
 +8618151961957
-
 No. 1, Zhenxing Road,
Chaoan District, Chaozhou City,
Guangdong Province, China