English

Stop the Drip: How to Fix a Leaky Faucet Like a Pro
April 15, 2025
Post Views: 31


Jabra Sanitary is a sanitaryware supplier offering toilets, sinks, faucets, bathtubs, etc., at competitive prices. If you're a distributor, wholesaler, or project contractor, get a quote today!
 $23.9 Limited-time Offer
- Consignment Policy
- 20 Years of Experience
We all know the frustration of a leaky faucet. The constant dripping not only drives you crazy, but also wastes water and inflates your utility bills. The good news is that most faucet leaks are easy to fix with a bit of know-how and the right tools.
Whether it's a worn-out washer, a damaged seal, or a clogged valve seat, identifying the root cause is the first step toward a successful fix for a leaky faucet. In this guide, we'll walk you through the entire process of fixing a leaky faucet.
From diagnosing the problem to replacing the necessary parts, we've got you covered. Whether you're a DIY novice or a seasoned handyman, our step-by-step instructions will help you tackle this common household issue. Let's dive in and put an end to that annoying drip once and for all!
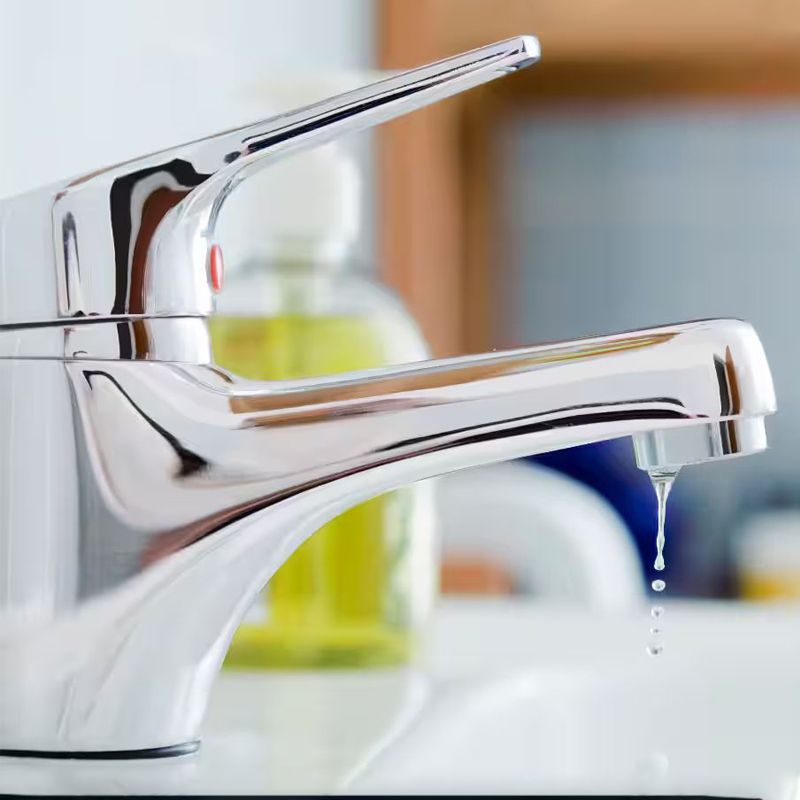
Table of Contents
What Causes a Leaky Faucet?
Tools and Materials Preparation
Identify the Type of Leaky Faucet
Step-by-Step Guide: How to Fix a Dripping Faucet
Common Problems and Solutions for Repairing a Leaky Faucet
Temporary Fixes for Emergency Leaking Faucet
Stop a Leaky Faucet: DIY vs. Professional Repair
FAQs
Conclusion
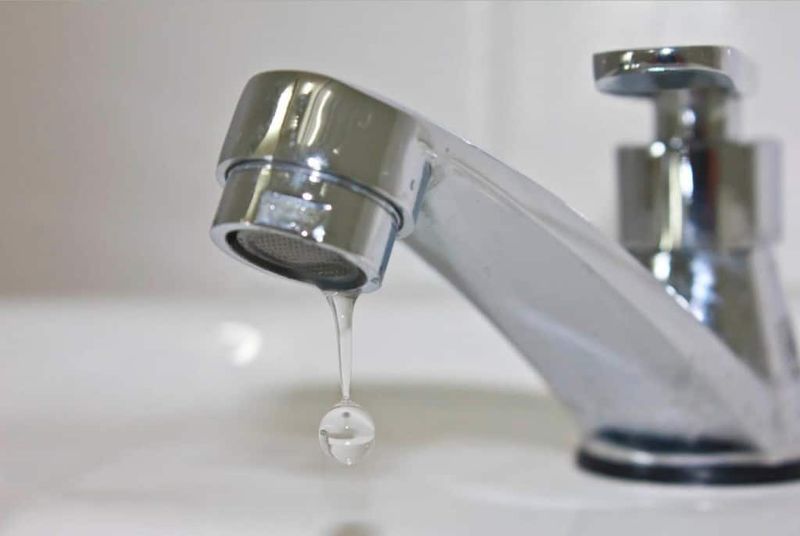
What Causes a Leaky Faucet?
Why is my sink dripping? It might be due to some common culprits below:
1. Worn-Out Parts
Over time, the components of your faucet wear down. Washers, O-rings, and seals are particularly susceptible to wear and tear.
Constant movement and water pressure can degrade these parts, causing them to lose their ability to form a tight seal. This often leads to leaks.
- Washers: These are often the primary source of leaks, especially in compression faucets. Friction from constant use can wear them out quickly.
- O-rings (rubber seals): These rubber seals prevent water from escaping between moving parts. When they degrade, water can leak around the faucet handle.
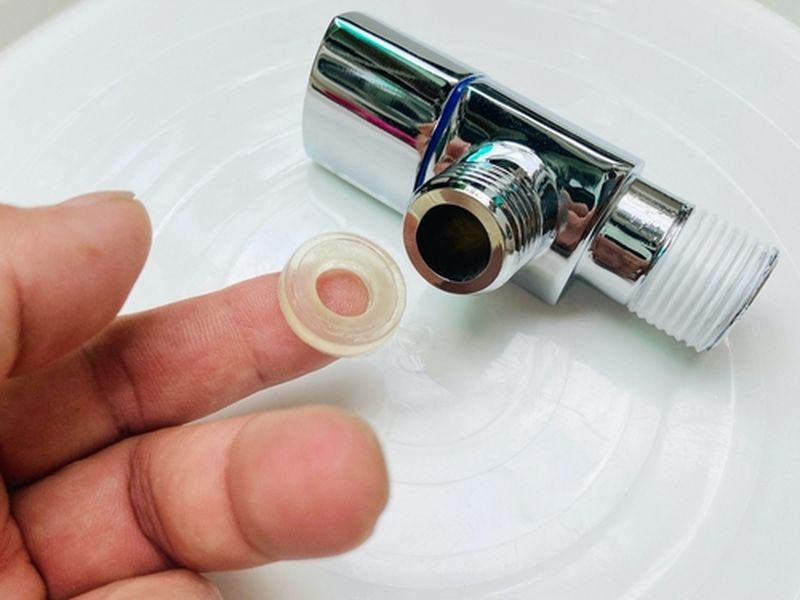
2. Seal Degradation
The seals in your faucet are designed to keep water in place. However, exposure to harsh water conditions, temperature changes, and general wear can cause them to break down. When this happens, water may drip or spray from the faucet base or handle, even when the faucet is off.
3. Valve Seats
The valve seat connects the faucet handle to the water valve. If it becomes corroded or damaged, water can leak from the base of the faucet. Mineral buildup from hard water is a common cause of corrosion, as minerals like calcium and lime accumulate over time.
4. Mineral Buildup
If you live in an area with hard water, mineral deposits can build up inside your faucet. These deposits can block water flow, cause corrosion, and lead to leaks. Regular cleaning is essential to prevent this issue.
Tools and Materials Preparation
Before you start fixing your leaky faucet, gather the necessary tools and materials. Having everything ready will make the process smoother and more efficient. Here's what you'll need:
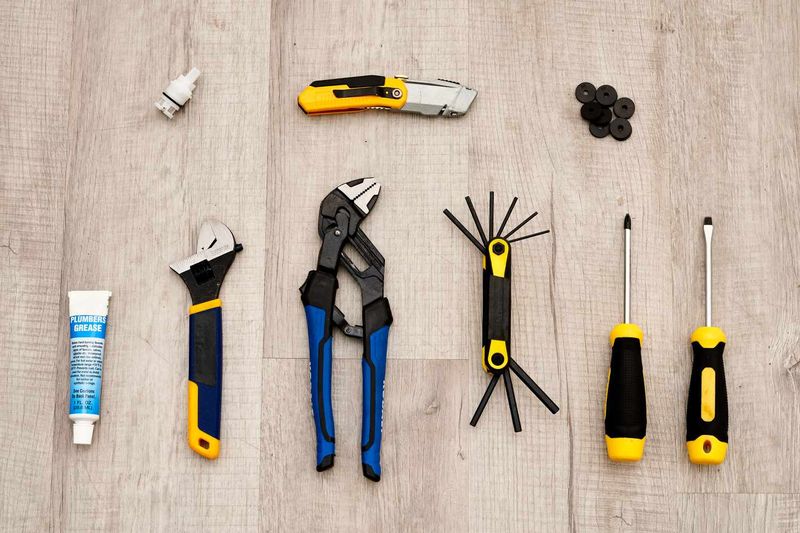
1. Basic Tools
- Screwdriver (Flathead and Crosshead): Essential for removing the faucet handle and any screws holding the faucet components in place.
- Adjustable Wrench or Pipe Wrench: Useful for loosening and tightening nuts and bolts during the repair.
- Allen Wrench: Some faucet models require an Allen wrench to remove the handle or access internal components.
- Pliers (Regular and Needle-Nose): These help with gripping and pulling out parts like washers, O-rings, or cartridges. Needle-nose pliers are particularly useful in tight spaces.
- Towel/Rag: Protects your sink and faucet from scratches and helps wipe away excess water or debris.
2. Replacement Parts
- New Gasket: Gaskets create a watertight seal between faucet components. Have a few on hand in different sizes to match your faucet.
- O-rings and Valve Core: Confirm the faucet model to ensure you get the right parts. These components are crucial for preventing leaks.
3. Optional Tools
- Lubricant (Vaseline or Silicone Grease): Reduces friction between moving parts and extends the life of seals and washers. Silicone grease is more durable and versatile for mechanical or high-temperature needs, while Vaseline is more common for everyday uses like skin care or low-demand lubrication.
- Vinegar or Descaling Agent: Helps remove mineral deposits and prevents clogging.
- Faucet Handle Puller: Useful for removing stuck handles.
Tip: Knowing your faucet's brand and model number can save time and frustration when purchasing replacement parts. Check the user manual or look up the brand and model online for exact specifications.
Identify the Type of Leaky Faucet
Now that you've gathered the tools, let's identify your faucet type to proceed. Different faucet types have unique mechanisms, so identifying yours is key to choosing the right repair method. Here are the four most common types:
1. Compression Faucets
These faucets use a rubber washer to seal the water flow. When the handle is turned, the washer compresses against the valve seat, stopping the water. Common issues include worn-out washers and squeaky handles.
Repair Tips: Replace the rubber washers and O-rings. Check the valve seat for corrosion.
2. Cartridge Faucets
These faucets use a movable cartridge to control water flow. Over time, the cartridge can wear out or become clogged, causing leaks.
Repair Tips: Replace the cartridge if it's damaged. Clean the cartridge if mineral buildup is the issue.
3. Ball Faucets
Ball faucets have a single handle that controls both temperature and water flow. They are more complex and have multiple seals and springs to prevent leaks.
Repair Tips: Replace worn seals and springs. Clean the ball assembly to remove debris.
4. Ceramic Disc Faucets
These faucets use two ceramic discs that slide over each other to control water flow. They are durable and less prone to leaks, but wear on the discs or seals can still cause issues.
Repair Tips: Replace the ceramic discs if they're cracked. Inspecting and replacing damaged seals.
Why Identifying the Faucet Type Is Important
Knowing your faucet type ensures you use the correct repair techniques and purchase the right replacement parts. This saves time and prevents further issues.
Step-by-Step Guide: How to Fix a Dripping Faucet
Now that you've identified the faucet type and gathered your tools, let's get to work. Follow these steps to repair your leaky faucet:
Step 1: Turn Off the Water Supply and Drain the Water Pipe
- Safety first! Before you start, shut off the water supply to the faucet to prevent any accidental spills or flooding. You also need to wear gloves or goggles.
- Locate the Shut-Off Valves: These are usually under the sink. Turn them clockwise to stop the water flow.
- Drain the Pipes: Open the faucet to release any remaining water in the pipes. This prevents water from spilling out while you work.
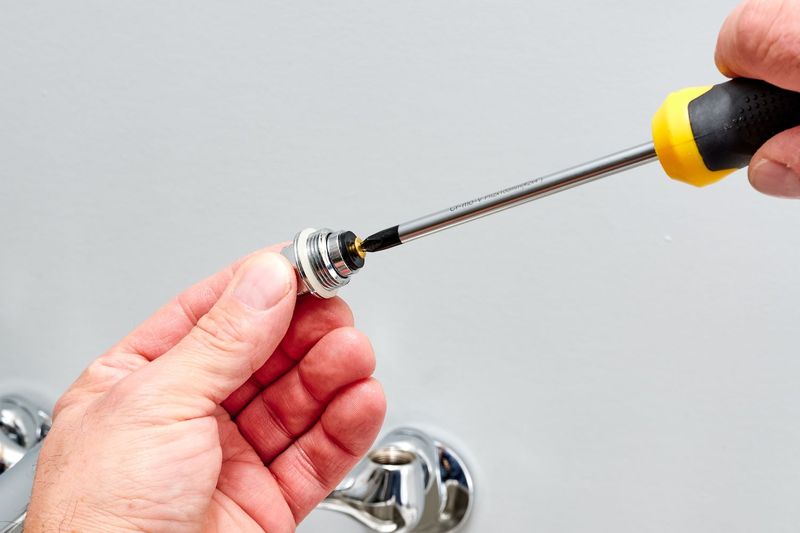
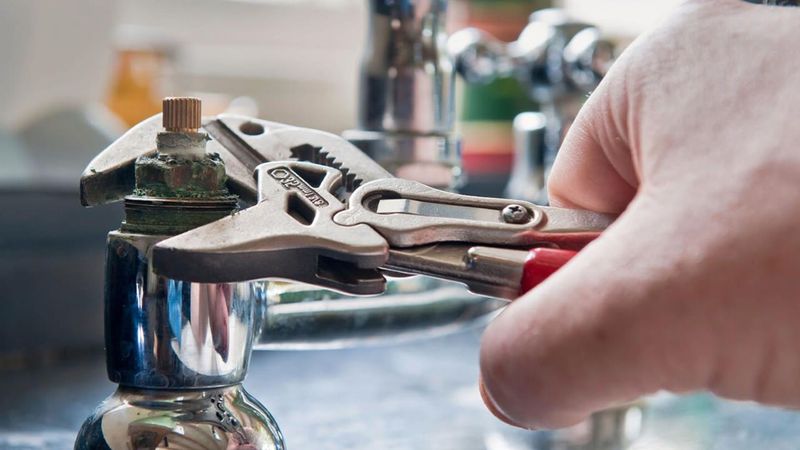
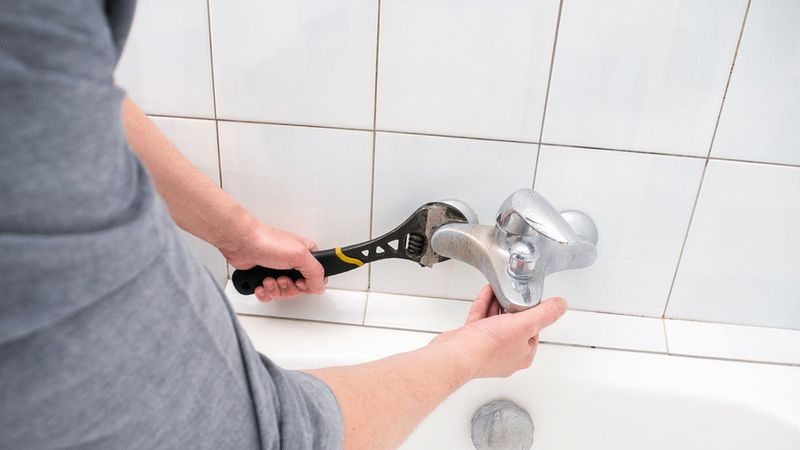
Step 2: Remove the Faucet Handle
- With the water supply off, it's time to remove the faucet handle. The process may vary slightly depending on your faucet model, but generally:
- Locate the Screw: Most handles are secured with a screw, often hidden under a decorative cap. Use a flathead screwdriver to pry off the cap if necessary.
- Unscrew the Handle: Use the appropriate screwdriver to remove the screw and lift off the handle. If the handle is stuck, gently tap it with a rubber mallet or use a handle puller.
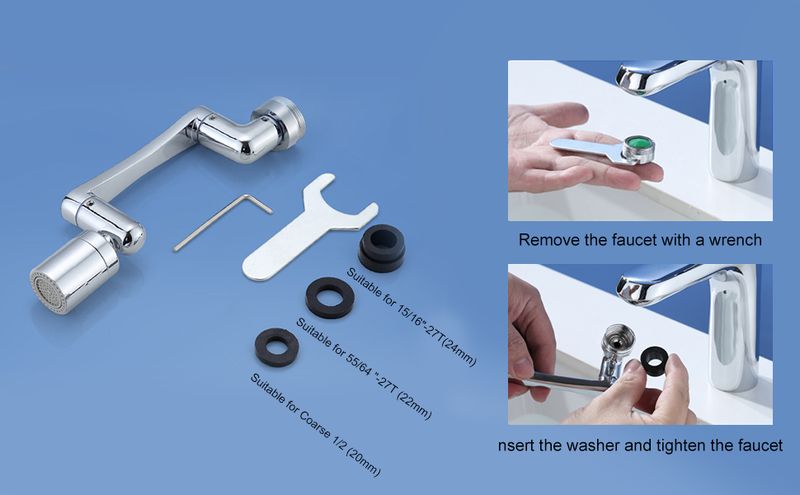
Step 3: Replace Washers and O-rings
Worn-out washers and O-rings are often the cause of leaks. Here's how to replace them:
- Locate the Washer or O-ring: Depending on your faucet type, you'll find these parts inside the faucet assembly, usually around the valve or cartridge.
- Remove the Old Parts: Use pliers to carefully remove the old washers or O-rings. Note their size and shape to ensure you get the right replacements.
- Install the New Parts: Place the new washers or O-rings in their correct positions. Lubricate them with silicone grease to extend their lifespan.
Step 4: Inspect and Replace Damaged Parts
If replacing washers and O-rings doesn't stop the leak, inspect and replace additional parts as needed:
- Cartridge or Ceramic Disc Faucets: Identify the cartridge type and remove the old cartridge or disc. Replace it with an identical model, following the manufacturer's instructions.
- Ball-Type Faucets: Disassemble the ball assembly, clean or replace worn parts, and reassemble.
Step 5: Test the Reassembled Parts
Once you've replaced all necessary parts, reassemble your faucet and test it:
- Reassemble the Faucet: Carefully put all parts back together, ensuring everything is aligned properly.
- Turn on the Water Supply: Slowly open the shut-off valves and check for leaks around the handle, spout, or base.
- Test the Faucet: Turn the handle to ensure smooth operation and check for dripping.
Common Problems and Solutions for Repairing a Leaky Faucet
Even with careful leaking faucet repair, you might encounter issues. Here are some common problems and solutions:
1. The Leak Has Not Stopped
If the leak persists after replacing parts, check for:
- Improperly Installed Parts: Ensure all new components are correctly aligned and installed.
- Inadequate Seals: Lubricate O-rings and washers with silicone grease to ensure a tight seal.
Solution: Double-check the alignment of replacement parts and apply lubricant as needed.
2. Skipping Lubrication
Lack of lubrication can cause parts to wear out quickly and lead to leaks.
Solution: Always use silicone-based lubricant or Vaseline on rubber parts like O-rings and washers. This reduces friction and extends their lifespan.
3. The Handle Cannot Be Turned
If the faucet handle is stiff or hard to turn, it might be due to misaligned components or mineral buildup.
Solution: Ensure all components are correctly aligned during reassembly. Clean the handle and valve stem to remove mineral deposits and apply lubricant to ease movement.
4. Parts Do Not Match
Using incorrect replacement parts can lead to improper repairs or continued leaks.
Solution: Always check your faucet's brand and model number before purchasing parts. Consult a professional if you're unsure about compatibility.
5. New Leak After Installation
If you notice a new leak after reassembly, it might be due to loose components or residual debris.
Solution: Double-check all parts to ensure they are tightened securely. Flush the faucet parts with vinegar or a descaling agent to clear any debris.
Temporary Fixes for Emergency Leaking Faucet
Sometimes, you might face a leaky faucet at an inconvenient time, like late at night or when you don't have the right tools.
Here are some temporary leaky sink faucet repairs to stop the leak until you can make a permanent repair. Don't worry if it takes a few tries—persistence pays off!
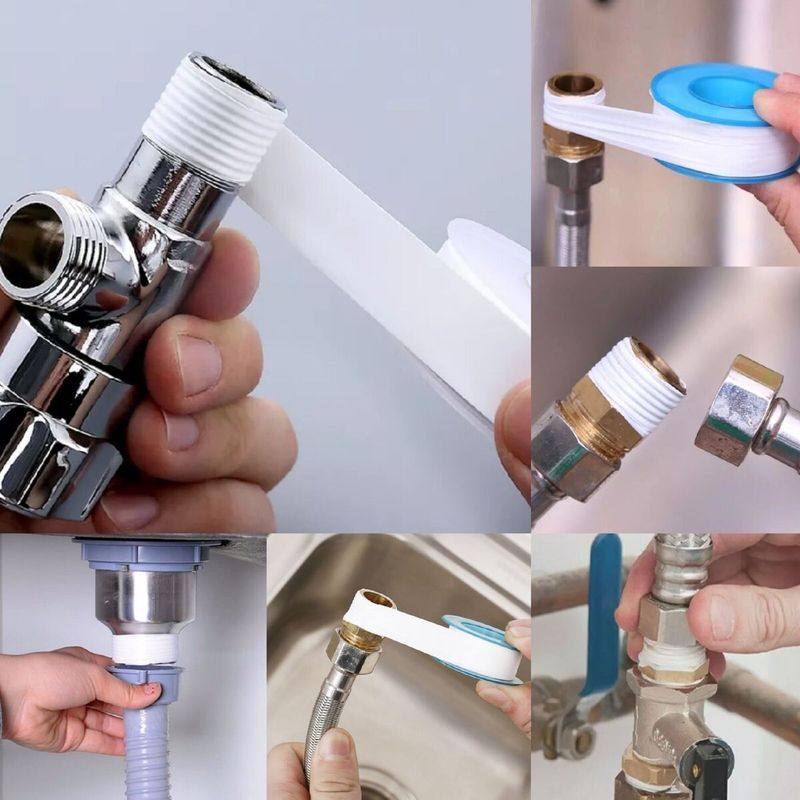
1. Use Plumber's Tape (Teflon Tape)
Plumber's tape is a versatile solution for small leaks. Wrap it around threaded connections to create a tight seal.
- Turn off the Water Supply: Remove any loose parts or handles.
- Wrap the Tape: Apply plumber's tape clockwise around the threads to prevent unraveling.
- Reassemble and Test: Turn on the water supply and check if the leak has stopped.
Note: Plumber's tape is a temporary solution. Replace damaged parts as soon as possible.
2. Apply Epoxy Putty
Epoxy putty can seal leaks around the faucet's base or handle.
- Turn off the Water Supply: Dry the area around the leak.
- Mix the Putty: Follow the package instructions to mix the epoxy putty.
- Apply and Harden: Cover the crack or gap with putty and let it harden as directed.
- Test: Turn on the water supply and check for leaks.
Note: Epoxy putty is ideal for larger cracks but should only be used temporarily. Replace the faucet components when you can.
3. Use a Rubber Band or Plastic Bag for Handle Leaks
If the leak is from the faucet handle, a rubber band or plastic bag can help reduce the flow.
- Turn off the Water Supply: Remove the faucet handle if possible.
- Wrap the Rubber Band: Place a rubber band around the connection where the leak is coming from.
- Place a Plastic Bag: If the leak is near the spout, use a plastic bag to catch the dripping water.
- Test: Turn on the water supply and check if the leak slows down.
Note: This is a very temporary fix. Replace parts within 24 hours.
4. Use a Bucket or Bowl to Catch the Drips
If you can't stop the leak immediately, placing a container under the faucet can minimize water wastage.
- Place a Container: Position a bucket or bowl under the faucet to catch drips.
- Monitor: Check the container periodically to prevent overflow.
Note: This method won't stop the leak but can help manage water until you can make repairs.
Stop a Leaky Faucet: DIY vs. Professional Repair
Fixing a leaky faucet can be a rewarding DIY project, but sometimes, it's best to call in the experts. Knowing when to tackle the dripping faucet repair yourself and when to seek professional help can save you time, money, and frustration.
DIY Repair: When to Fix It Yourself
We believe in empowering homeowners to take control of their home repairs, and fixing a leaky faucet is often a manageable task with the right tools and guidance.
Here's why you might choose to handle the repair yourself:
1. Cost Savings
Repairing a leaky faucet on your own is typically much cheaper than hiring a professional plumber. You'll only need to invest in the necessary parts—such as washers, O-rings, or a new cartridge—and utilize tools that are likely already in your toolbox.
This approach can significantly reduce your expenses while giving you a sense of accomplishment.
2. Simplicity of the Problem
Most faucet leaks stem from straightforward issues like worn-out washers, O-rings, or corroded valve seats. If the problem seems basic and doesn't involve complex plumbing systems, a DIY fix can be quick and effective.
These types of repairs are usually within the reach of most homeowners, even if you're not a seasoned DIYer.
3. Satisfaction of Self-Sufficiency
There's something incredibly satisfying about solving a problem yourself. If you enjoy DIY projects, fixing a leaky faucet can be a rewarding experience that boosts your confidence for future home repairs. It's a practical skill that can serve you well in many other areas of home maintenance.
When to DIY:
- When you're dealing with a simple leak caused by a worn-out part.
- If the faucet is easily accessible and doesn't require specialized tools.
- If you have the time and want to save money.
Professional Repair: When to Call a Plumber
While many faucet repairs are well-suited for DIY, there are situations where calling in a professional plumber is the best choice. Here's when you should consider professional help:
1. Complex Plumbing Problems
If the faucet leak is part of a larger plumbing issue—such as problems with the pipes, water pressure, or the water supply system—it's best to leave the repair to a professional plumber.
Issues beyond the faucet itself, like corroded pipes or damaged valve seats, can be tricky and require specialized knowledge. A plumber has the expertise to diagnose and fix these underlying problems effectively.
2. Damaged Faucet Components
If the faucet parts (such as the cartridge or valve core) are severely damaged or the faucet is an older model, it might be more practical to replace the entire faucet rather than attempt a repair.
A plumber can help you select a new faucet and install it properly, ensuring it functions smoothly and looks great in your kitchen or bathroom.
 Ads
Ads
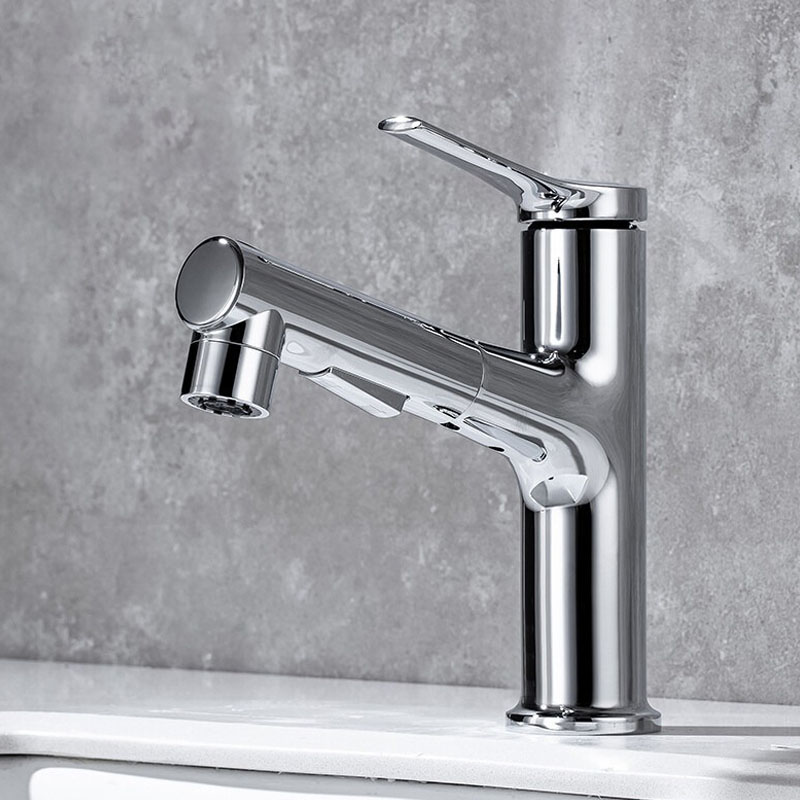
Hot and Cold Pull Down Bathroom Basin Tap
This is the Hot and Cold Pull Down Bathroom Basin Tap EF8210, a premium hot and cold basin tap designed for modern bathroom spaces. Its full-range pull-down feature allows for comprehensive cleaning with no dead angles, offering maximum flexibility.
3. Lack of Time or Confidence
If you're not comfortable with DIY repairs or don't have the time to dedicate to the project, calling a plumber might be the most efficient solution.
A professional can often fix the issue quickly and ensure that everything is properly installed, saving you the stress and potential mistakes of a DIY attempt.
4. Persistent Leaks After Repair Attempts
If you've already attempted to fix the faucet but the leak continues or worsens, it might be time to consult a professional.
A plumber will be able to diagnose any underlying issues and provide a more permanent solution. Sometimes, what seems like a simple repair might mask deeper problems that require a professional's touch.
When to Call a Plumber:
- When the leak is part of a larger plumbing issue.
- If the faucet requires complicated repairs or replacement of major components.
- When you're unsure of the cause of the leak or if previous attempts haven't worked.
Here's a cost comparison between fixing a leaky faucet yourself (DIY) and hiring a professional plumber:
Repair Method |
Estimated Cost |
Time Required |
Skill Level |
Pros |
Cons |
|---|---|---|---|---|---|
DIY (Plumber's Tape or Epoxy Putty) |
$5 - $20 (Materials Only) |
1 - 2 Hours |
Basic plumbing knowledge |
Low cost, easy to get started |
Temporary fix; we may need parts replacement soon |
Professional Plumber |
$100 - $200 (Labor + Parts) |
1 - 3 Hours |
Advanced plumbing expertise |
Permanent fix, guaranteed work |
Higher cost, may require scheduling |
Ultimately, the decision between DIY and professional repair comes down to the complexity of the issue and your comfort level with performing the repair yourself. If you're dealing with a simple issue like a worn-out washer or O-ring, a DIY fix is probably the way to go.
However, if the problem is more complex or you simply don't have the time or expertise, calling a plumber will ensure the job is done correctly. Remember, the key is to act promptly to save water and money.
FAQs
In this section, we'll answer some of the most frequently asked questions about leaky sink faucets.
1. How Do I Know if My Faucet Leak is Serious?
A small drip might seem harmless, but if left untreated, it can waste a significant amount of water and increase your water bill. If the faucet leaks constantly, even when it's turned off, or if the leak is large enough to cause water damage, it's time to address the problem.
A persistent drip could indicate a worn-out part, such as a washer or cartridge, and should be fixed as soon as possible.
2. How Long Should It Take to Change a Faucet?
The time it takes to replace a faucet depends on your experience, the type of faucet, and the complexity of the repair. For a simple faucet replacement or repair, you can expect the job to take between 30 minutes to an hour.
If you're dealing with a more complicated faucet or plumbing issue, it may take longer. Always ensure you have the correct parts before starting to avoid unnecessary delays.
3. How Often Should You Replace a Faucet Cartridge?
A faucet cartridge typically lasts between 5 to 10 years, but this can vary depending on factors such as water quality and frequency of use.
If your faucet is leaking or the handle feels loose or difficult to turn, it's likely time to replace the cartridge. Regular maintenance, such as inspecting and lubricating the cartridge, can extend its lifespan.
4. Can I Fix a Leaky Faucet Without Replacing the Entire Unit?
Yes, in most cases, you can fix a leaky faucet without replacing the entire unit. Common issues like worn-out washers, O-rings, or a damaged cartridge can usually be repaired with replacement parts.
However, if the faucet body itself is cracked or severely damaged, it might be more cost-effective to replace the entire faucet.
5. How Much Does It Cost for a Plumber to Fix a Leaking Faucet?
The cost to repair a leaky faucet by a professional plumber can range from $100 to $300, depending on factors like the complexity of the repair, your location, and whether parts need to be replaced.
Some plumbers charge by the hour, while others may offer flat rates for specific services. It's always a good idea to get a quote before the work begins to avoid unexpected costs.

Conclusion
Fixing a leaky faucet is a straightforward task that most homeowners can tackle themselves with a little knowledge and the right tools. In this guide, we've covered everything from identifying the causes of leaks to providing step-by-step instructions for repairs.
Whether it's worn-out washers, damaged cartridges, or mineral buildup, there's always a solution to stop the drip and restore your faucet to proper working condition.
Don't let a small leak turn into a big problem. If you're ready to fix your leaking faucet, use the steps outlined in this guide or contact a trusted plumber for a quote today. Protect your home and save water by taking action now! Choose us at jabrasanitary.com to turn the challenges of a leaky faucet into opportunities for a seamless repair experience.
More Reading


Request Free Quote Today!
Jabra Sanitary is a manufacturer of high-quality sanitary ware based on innovative technology. We are always ready to help with your building and infrastructure projects.
Please leave your contact details below, and we'll get back to you within 8 business hours to discuss your needs.
Stay Updated With Our Latest News & Products
© 2025 Jabra Sanitary Ware. All Rights Reserved.
Products
Contact Info
-
 sales@jabrasanitary.com
-
 +8618151961957
-
 +8618151961957
-
 No. 1, Zhenxing Road,
Chaoan District, Chaozhou City,
Guangdong Province, China