English

Expert Guide: How to Adjust Water Level on Toilet Tank
May 13, 2024
Post Views: 2000


Jabra Sanitary is a sanitaryware supplier offering toilets, sinks, faucets, bathtubs, etc., at competitive prices. If you're a distributor, wholesaler, or project contractor, get a quote today!
 $23.9 Limited-time Offer
- Consignment Policy
- 20 Years of Experience
As a homeowner or tenant, maintaining the correct water level in toilet bowl in your toilet tank is crucial for flushing and preventing costly water wastage.
Over time, the water level in the tank can fluctuate due to various factors, leading to inefficient flushing or even overflow. Neglecting this issue can result in higher water bills, potential water damage, and a less-than-ideal bathroom experience.
In this comprehensive guide, I'll walk you through the importance of maintaining the correct water level, provide step-by-step instructions for adjusting the toilet tank water level, and share valuable tips to troubleshoot common issues.
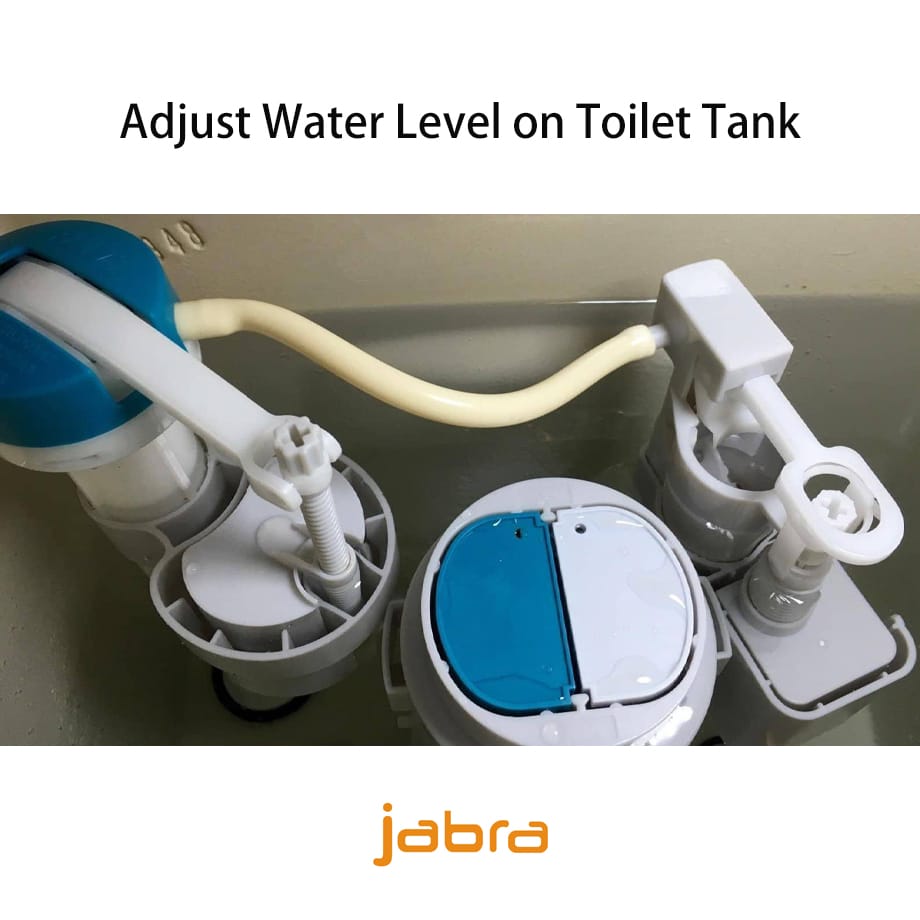
Table of Contents
Components of the Toilet Tank
Tools and Preparations for Adjusting Toilet Tank Water Level
Step-by-Step Guide: How to Adjust Toilet Bowl Water Level
How to Adjust Water Level in Toilet Tank for Different Fill Valves
Troubleshooting Common Issues When Adjusting Toilet Tank Water Level
When to Call a Professional: Beyond Basic Adjustments
Preventative Measures for Maintaining the Ideal Water Level in a Toilet
Conserving Water: Balancing Efficient Flushing with Conservation
Conclusion: Ensuring Optimal Performance and Hygiene
The toilet tank is essential for the toilet's flushing mechanism. Inside the tank, several components work in harmony to ensure that water flows into the bowl efficiently.
Fill Valve: Sometimes called the ballcock or refill valve, it controls the water that enters the tank from the supply line. This valve is often connected to a float, which rises and falls with the water level and signals when to allow or stop water from filling the tank.
Float: This buoyant device, typically attached to the fill valve, is critical for maintaining the water level. As the water rises, so does the float, until it reaches a preset height where it stops the fill valve from letting in more water.
Flush Valve and Flapper: Located at the bottom of the tank, this assembly is responsible for releasing water into the toilet bowl during a flush. The flapper or seal covers the flush valve opening and lifts when the flush lever is activated, allowing water to flow into the bowl.
Overflow Tube: This safety feature prevents the tank from overflowing. Should the fill valve or float fail and water continues to fill the tank, excess water is diverted to the overflow tube and down into the toilet bowl.
Flush Lever and Chain: The flush lever, externally seen on the tank, connects to a chain that lifts the flapper when the lever is actuated, triggering a flush.
By understanding these components, one can better diagnose issues and toilet bowl water level adjustment.
When setting out to adjust the water level in your toilet tank or bowl, it's important to have the right tools and materials at hand for a smooth process. Here's a concise list of what you'll generally need:
- Adjustable Wrench: Often used for turning the adjustment screw or nuts on the assembly.
- Gloves: To keep hands clean and dry when working inside the tank.
- Flathead Screwdriver: Required for adjusting the water level screw on some toilet models.
- Rag or Sponge: Handy for wiping up any water that may spill when you remove the tank lid or adjust components.
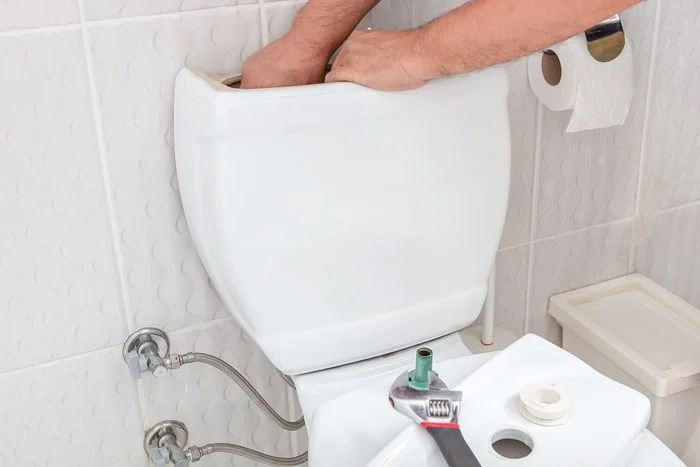
Before starting the adjustment process, one should:
- Locate the water shut-off valve near the base of the toilet and turn it off.
- Flush the toilet to empty the tank of water.
- Absorb any remaining water with a sponge or rag, to provide a dry work area.
Preparation Steps:
- Ensure the toilet's flush valve is functioning correctly; if it's faulty, water level adjustments may not work effectively.
- Check for any signs of damage or wear on the toilet's components, which might necessitate replacements rather than adjustments.
- Clear the work area of any personal items or obstructions to allow for easy access to the toilet tank.
By having these tools and taking these preparatory steps, one can approach the task of adjusting the toilet's water level with confidence, knowing they are well-prepared for a successful outcome.
Step-by-Step Guide: How to Adjust Toilet Bowl Water Level
Adjusting the water level in your toilet tank is a relatively straightforward process that can be accomplished with a few simple steps. Here's how to do it:
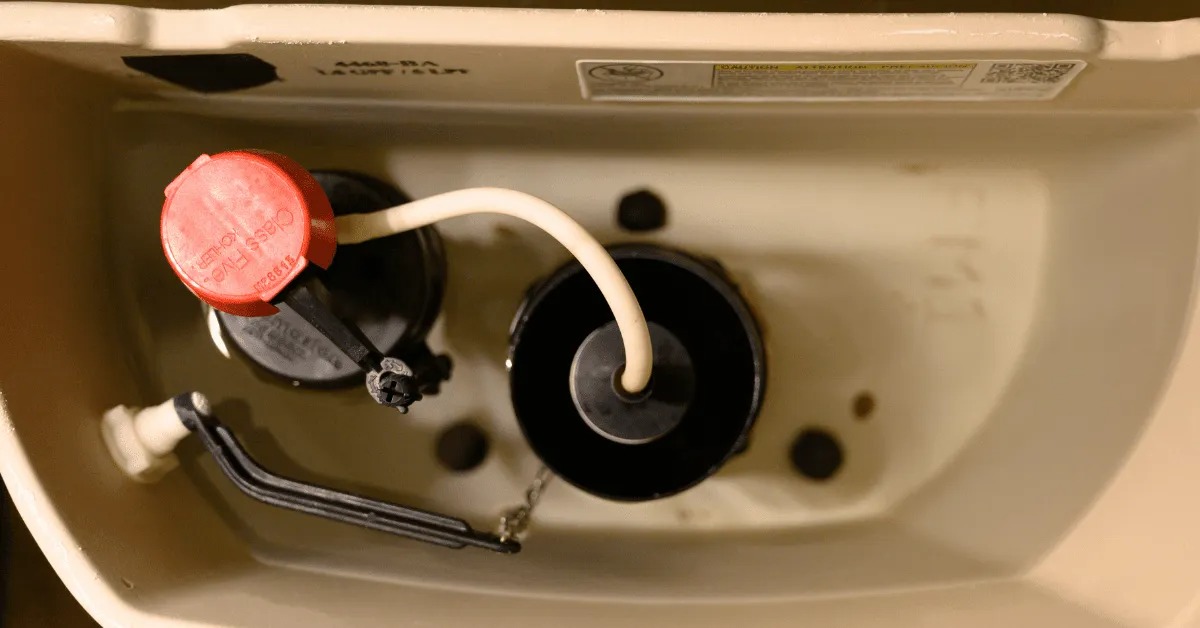
Locate the Fill Valve: Inside the toilet tank, you'll find a vertical plastic or metal tube with a floating ball or cup at the top. This is the fill valve, which controls the water level in the tank.
Adjust the Fill Valve: Most modern fill valves have an adjustable screw or clip mechanism that allows you to increase water level in toilet bowl or lower toilet bowl water level. If your fill valve has a screw, turn it clockwise to raise the water level or counterclockwise to lower it. If it has a clip, simply slide it up or down along the fill valve shaft.
Flush and Observe: After adjusting, flush the toilet and observe the water level in the tank. If it's still not at the desired level, repeat the adjustment process until you achieve the optimal height, typically about an inch below the overflow tube.
Remember, it's essential to follow the toilet supplier's instructions for your specific toilet model, as adjustments may vary slightly.
Low Water Level in the Tank:
- Cause: Incorrect float height.
- Solution: To raise water level in toilet bowl, you need to adjust the float by either turning a screw or sliding a clip along a rod. Higher settings allow more water into the tank.
Weak Flushes:
- Cause: Water level below manufacturer's line.
- Solution: How to increase toilet water level? Follow the steps above. Ensure water level is approximately 1/2- to 1-inch below the overflow tube.
Water Level Too High:
- Cause: Overly high float setting.
- Solution: Lower the float to decrease water level.
Table of Possible Problems and Adjustments
| Issue | Symptom | Likely Cause | Adjustment Method |
|---|---|---|---|
| Low Water Level in Bowl | Inefficient flushing | Low tank water level | Adjust the float |
| Constant Running Water | Water spill into overflow | High tank water level | Lower the float setting |
In the process of adjustment, it's critical to do so incrementally to avoid overshooting the desired water level. Physical damage to components inside the tank may require replacement rather than adjustment. If issues persist after making proper adjustments, it might indicate a more serious problem that could require professional intervention.
How to Adjust Water Level in Toilet Tank for Different Fill Valves
Toilet tanks commonly use two types of fill valves: the float cup fill valve and the float ball fill valve. Adjusting the water level in your toilet tank can ensure efficient toilet operation and prevent overflows or inadequate flushes.
Float Cup Fill Valve
- Locate the Adjustment Rod: One finds the adjustment rod attached to the float cup.
- Adjust the Height: To increase water level, pinch the spring clip and raise the float cup. Conversely, to decrease, slide the float cup down.
These fill valves are detailed in guides such as How to Adjust a Toilet Fill Valve - The Spruce.
Float Ball Fill Valve
- Search for the Screw: This will be located where the float arm is connected to the valve.
- Turn the Screw: Turning the screw clockwise raises water level, while counterclockwise lowers it.
In-depth instructions can be found at How to Adjust the Fill Valve on a Toilet: A Complete Guide - wikiHow.
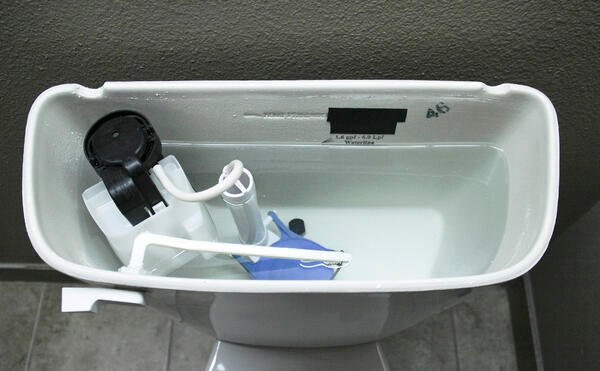
For both fill valve types, it's crucial to:
- Check the indicate line inside the tank for the ideal water level.
- Test the Adjustment by flushing the toilet and observing how water refills.
One should also consider cleaning the fill valve, as obstructions can affect water level, as discussed at YouTube video here.
By following these steps closely, one can adjust the water levels in their toilet tank effectively, maintaining proper toilet function.
Troubleshooting Common Issues When Adjusting Toilet Tank Water Level
Even after following the proper steps, you may encounter some common issues when attempting to adjust the water level in your toilet tank or bowl. Here are some troubleshooting tips:
Stuck or Corroded Fill Valve: If the fill valve is stuck or corroded, it may resist adjustment. In this case, you may need to replace the entire fill valve assembly.
Faulty Flapper or Flush Valve: A worn-out or damaged flapper or flush valve can cause water to continuously run into the bowl, affecting the water level. Replacing these components may be necessary.
Clogged or Blocked Overflow Tube: The overflow tube in the toilet tank is designed to prevent water from overflowing. If this tube is clogged or blocked, it can interfere with the water level adjustment. Clearing any obstructions in the overflow tube should resolve the issue.
Sediment Buildup: Over time, sediment and mineral deposits can accumulate in the toilet tank and bowl, affecting the water level. Regular cleaning and descaling can help maintain proper water levels.
Overflow Tube Issues: If water continuously flows into the overflow tube, the fill valve may need to be replaced.

When to Call a Professional: Beyond Basic Adjustments
While adjusting the water level in your toilet tank is a relatively simple task, there may be instances when it's best to call a professional plumber. Here are some situations where seeking expert assistance is recommended:
Persistent Issues: If you've tried adjusting the water level multiple times without success, or if the issue persists despite your efforts, it's time to call a plumber. There may be an underlying problem that requires more advanced troubleshooting or repairs.
Toilet Replacement: If your toilet is old, outdated, or beyond repair, a professional plumber can assist you in selecting and installing a new, water-efficient model.
Plumbing System Issues: If the water level issue is accompanied by other plumbing problems, such as low water pressure or drainage issues, it's best to have a plumber inspect your entire plumbing system.
Complex Repairs: If the necessary repairs involve accessing or replacing components behind walls or under floors, a professional plumber with the right tools and expertise is better equipped to handle the job safely and efficiently.
Remember, attempting complex plumbing repairs without the proper knowledge and tools can lead to further damage and costly mistakes.
Preventative Measures for Maintaining the Ideal Water Level in a Toilet
While adjusting the water level is a straightforward task, it's essential to take preventative measures to ensure your toilet continues to function optimally. Here are some tips to help you maintain the ideal water level:
Regular Maintenance: Perform regular checks on the toilet tank components, such as the fill valve, flapper, and flush valve. Replace any worn or damaged parts as needed.
Descaling and Cleaning: Regularly clean and descale the toilet tank and bowl to prevent mineral buildup and sediment accumulation, which can interfere with proper water levels.
Water Supply Line Check: Inspect the water supply line for any leaks or damage, as these can affect the water level in the tank and bowl.
Toilet Replacement: If your toilet is old or experiencing frequent issues, consider replacing it with a newer, more efficient model. Modern toilets are designed to conserve water while providing optimal flushing performance.
Conserving Water: Balancing Efficient Flushing with Conservation
While maintaining the correct water level in your toilet is essential for proper flushing and hygiene, it's also crucial to consider water conservation efforts. Here are some tips to help you balance efficient flushing with water conservation:
Install Water-Efficient Toilets: Consider upgrading to a low-flow or dual-flush toilet, which can significantly reduce water consumption without compromising flushing performance.
Adjust Water Levels Appropriately: Follow the manufacturer's recommendations for the optimal water level in your toilet tank. Keeping the water level too high can lead to unnecessary water wastage.
Fix Leaks Promptly: Address any leaks in your toilet or plumbing system as soon as possible to prevent water loss and reduce your water bill.
Practice Water-Saving Habits: Encourage your household members to adopt water-saving habits, such as avoiding unnecessary flushing and taking shorter showers.
By implementing these water conservation measures, you can help reduce your household's water consumption while still maintaining a properly functioning and hygienic toilet.
Conclusion: Ensuring Optimal Performance and Hygiene
Maintaining the correct water level in your toilet tank is a crucial aspect of ensuring proper flushing performance, hygiene, and water conservation.
By following the step-by-step guide provided in this article, you can easily adjust the water level to its optimal level and troubleshoot common issues.
Remember, regular maintenance and preventative measures are key to avoiding future problems and ensuring your toilet operates efficiently for years to come.
If you encounter persistent issues or complex repairs, don't hesitate to seek professional assistance from a licensed plumber.
By taking proactive steps to maintain the ideal water level in your toilet, you'll not only enjoy a more pleasant bathroom experience but also contribute to water conservation efforts and potentially save money on your water bills.

Request Free Quote Today!
Jabra Sanitary is a manufacturer of high-quality sanitary ware based on innovative technology. We are always ready to help with your building and infrastructure projects.
Please leave your contact details below, and we'll get back to you within 8 business hours to discuss your needs.
Stay Updated With Our Latest News & Products
© 2025 Jabra Sanitary Ware. All Rights Reserved.
Products
Contact Info
-
 sales@jabrasanitary.com
-
 +8618151961957
-
 +8618151961957
-
 No. 1, Zhenxing Road,
Chaoan District, Chaozhou City,
Guangdong Province, China